Asynchronous Tasks with Celery
Last updated on July 27, 2020
What is Celery #
Django is designed for short-lived requests. Consequently, if you ever need to perform a long-running operation, you should always perform it outside of the request-response cycle.
The following are some examples of long-running operations:
- sending emails or mass email
- transcoding media files
- image processing
- generating reports
and so on.
Trying to perform these operations within the request-response cycle will significantly increase the waiting time and size of HTTP response. This could eventually, drive the users away from the site. Furthermore, these operations are also subject to failures. For this reason, we might want to have a retry policy.
The solution is to maintain a queue of long-running operations and launch them asynchronously.
Fortunately, we have a great package called Celery which does all the heavy-lighting for us.
Quoting from the Celery documentation:
Celery is an asynchronous task queue based on distributed message passing. It is focused on real-time operation but supports scheduling as well.
In addition to running asynchronous tasks, Celery also gives you option to execute task periodically.
To install Celery execute the following command:
$ pip install celery
Next, you need a message broker. A broker is where your tasks get stored as a queue. The broker sends these messages to Celery workers, which then executes the task and provides a response. By default, Celery uses RabbitMQ as a message broker. To install RabbitMQ execute the following command:
$ sudo apt-get install rabbitmq-server
After the installation rabbitmq-server will start automatically. You can check the status of the rabbitmq-server using the following command:
$ sudo service rabbitmq-server status
If for some reason rabbitmq-server doesn't start automatically, type the following command in the shell:
$ sudo service rabbitmq-server start
To stop the rabbitmq-server use the following command:
$ sudo service rabbitmq-server stop
Integrating Celery with Django #
To add Celery to the Django project, we have to first create an instance of Celery app along with some configurations.
Create a new file named celery.py next to settings.py in the Django configuration directory and add the following code to it:
djangobin/django_project/django_project/celery.py
1 2 3 4 5 6 7 8 9 10 11 12 13 14 15 16 17 | from __future__ import absolute_import, unicode_literals
import os
from celery import Celery
# set the default Django settings module for the 'celery' program.
os.environ.setdefault('DJANGO_SETTINGS_MODULE', 'django_project.settings')
app = Celery('djangobin')
# Using a string here means the worker doesn't have to serialize
# the configuration object to child processes.
# - namespace='CELERY' means all celery-related configuration keys
# should have a `CELERY_` prefix.
app.config_from_object('django.conf:settings', namespace='CELERY')
# Load task modules from all registered Django app configs.
app.autodiscover_tasks()
|
In line 1-3, we are importing necessary functions and modules.
In line 6, we set DJANGO_SETTINGS_MODULE environment variable for the celery command line application.
In line 8, we create an instance of Celery by passing it the name of the Django application.
In line 14, we load any custom configurations from project's settings.py file.
Finally, in line 17, we tell Celery to auto discover tasks form the applications listed in INSTALLED_APPS setting. With this line in place, Celery will look for a module named tasks.py in every installed app to load tasks in it.
Next, we have to load the Celery instance every time the Django starts. To do so, add the following lines in __init__.py file in Django configuration directory.
djangobin/django_project/django_project/__init__.py
1 2 3 4 5 6 7 | from __future__ import absolute_import, unicode_literals
# This will make sure the app is always imported when
# Django starts so that shared_task will use this app.
from .celery import app as celery_app
__all__ = ['celery_app']
|
Now, we are ready to define some tasks.
Creating Asynchronous Tasks #
In this section, we are going to create asynchronous tasks to send emails.
As things stand, there are three points in our application where we are sending emails.
- Contact Form
- Password Reset
- Account Activation
The Contact form and Account Activation uses mail_admins() and send_mail() functions to send mail. Both of them are synchronous functions which means they will block the execution of the program until they are done working.
However, if you have used the application thoroughly, you will find that we are not experiencing any delay at all. This is because we are currently using the console backend, if we switch to SMTP backend the delay will be significant.
The Password Reset mechanism also uses send_mail() function to send the reset password link but to keep things simple and easy to follow we will not going change it.
Let's define some tasks now.
Create a new file named tasks.py in the djangobin app directory and add the following code to it:
djangobin/django_project/djangobin/tasks.py
1 2 3 4 5 6 7 8 9 10 11 12 13 14 15 16 17 18 19 20 21 22 23 24 25 | from celery import task
from django.template.loader import render_to_string
from django.contrib.auth.models import User
from django.core.mail import BadHeaderError, send_mail, mail_admins
from django.contrib.auth.tokens import default_token_generator
from django.utils.encoding import force_bytes
from django.utils.http import urlsafe_base64_encode
from django.conf import settings
@task
def send_activation_mail(user_id, context):
user = User.objects.get(id=user_id)
context.update({
'username': user.username,
'uid': urlsafe_base64_encode(force_bytes(user.pk)),
'token': default_token_generator.make_token(user),
})
subject = render_to_string('djangobin/email/activation_subject.txt', context)
email = render_to_string('djangobin/email/activation_email.txt', context)
send_mail(subject, email, settings.DEFAULT_FROM_EMAIL, [user.email])
|
A task is just an ordinary function defined using @task decorator. The send_activation_mail() function accepts user_id and context arguments and sends an email using the send_mail() function.
The arguments you pass to the task functions are serialized and stored in the broker. The newer versions (since 4.0) of Celery uses JSON as default serialization method. The JSON serializer can only serialize simple objects like int, string, list etc. It can't serialize complex objects like Model instances, HttpRequest instance, bytestring and so on.
This is the reason why we are sending user_id to the send_activation_mail() function instead of the User instance. For the same reason, we are creation half of the context data in the send_activation_mail() instead of passing it directly from save() method of CreateUserForm form.
Note: We can pass a complex object to the task function by changing the default serializer to pickle. In fact, in an older version of Celery (before 4.0), pickle was the default serializer. However, because of some security vulnerabilities, pickle is not the recommended way to do things.
The next step is to call this task, which we do using the delay() method. Here is the updated version of the save() method.
djangobin/django_project/djangobin/forms.py
1 2 3 4 5 6 7 8 9 10 11 12 13 14 15 16 17 18 19 20 21 22 | #...
from .tasks import send_activation_mail
#...
class CreateUserForm(UserCreationForm):
#...
def save(self, request):
user = super(CreateUserForm, self).save(commit=False)
user.is_active = False
user.save()
context = {
'protocol': request.scheme,
'domain': request.META['HTTP_HOST'],
}
send_activation_mail.delay(user.id, context) ## calling the task
return user
|
The delay() method only puts the task in the queue. It is the job of celery worker to execute it as soon as possible.
Everything is in place now, all we need is to start the Celery worker.
In the terminal, make sure your current working directory is set to project root directory, and then start the Celery worker by typing:
$ celery -A django_project worker -l info
The output will be something like this:
1 2 3 4 5 6 7 8 9 10 11 12 13 14 15 16 17 18 19 20 21 22 23 24 25 | $ celery -A django_project worker -l info
-------------- celery@pc v4.1.0 (latentcall)
---- **** -----
--- * *** * -- Linux-4.10.0-38-generic-x86_64-with-LinuxMint-18.3-sylvia 2018-04-24 07:05:26
-- * - **** ---
- ** ---------- [config]
- ** ---------- .> app: djangobin:0x7f39e8f00860
- ** ---------- .> transport: amqp://guest:**@localhost:5672//
- ** ---------- .> results: disabled://
- *** --- * --- .> concurrency: 4 (prefork)
-- ******* ---- .> task events: OFF (enable -E to monitor tasks in this worker)
--- ***** -----
-------------- [queues]
.> celery exchange=celery(direct) key=celery
[tasks]
. djangobin.tasks.send_activation_mail
[2018-04-24 07:05:27,010: INFO/MainProcess] Connected to amqp://guest:**@127.0.0.1:5672//
[2018-04-24 07:05:27,020: INFO/MainProcess] mingle: searching for neighbors
[2018-04-24 07:05:28,066: INFO/MainProcess] mingle: all alone
[2018-04-24 07:05:28,087: WARNING/MainProcess] /home/pp/djangobin/env/lib/python3.5/site-packages/celery/fixups/django.py:202: UserWarning: Using settings.DEBUG leads to a memory leak, never use this setting in production environments!
warnings.warn('Using settings.DEBUG leads to a memory leak, never '
[2018-04-24 07:05:28,088: INFO/MainProcess] celery@pc ready.
|
Celery worker is now up and running. Start the Django development server if not already running and create a new user by visiting http://localhost:8000/signup/.
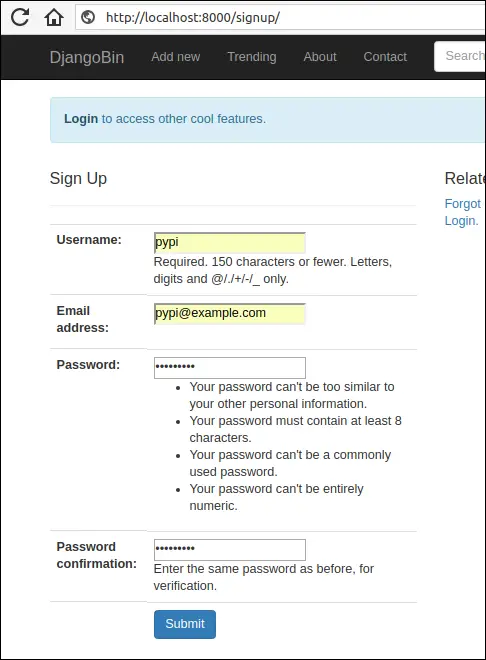
Enter data in all the fields and hit submit. In the shell, running the Celery worker you will get output like this:
1 2 3 4 5 6 7 8 9 10 11 12 13 14 15 16 17 18 | [2018-05-12 04:21:11,012: INFO/MainProcess] Received task: djangobin.tasks.send_activation_mail[79849f4e-2a9b-44b1-bcb3-242ef180e2ef]
[2018-05-12 04:21:11,096: WARNING/ForkPoolWorker-2] Content-Type: text/plain; charset="utf-8"
MIME-Version: 1.0
Content-Transfer-Encoding: 7bit
Subject: Action Required to Complete the Account Creation - djangobin
From: infooveriq@gmail.com
To: pypi@example.com
Date: Sat, 12 May 2018 04:21:11 -0000
Message-ID: <20180512042111.9675.41529@pc>
Hello pypi!
To confirm your registration, visit the following link:
http://localhost:8000/activate/MTU/4w4-8eac5c27a7e29b8190c9/
Welcome to Djanagobin!
[2018-05-12 04:21:11,097: WARNING/ForkPoolWorker-2] ---------------------------------------------------------
|
Our asynchronous task has been executed. To activate the user copy and paste the URL into the browser address bar.
Let's create another task to send feedback email to the site admins. Open tasks.py and add send_feedback_mail() task just below the send_activation_mail() task as follows:
djangobin/django_project/djangobin/tasks.py
1 2 3 4 5 | #...
@task
def send_feedback_mail(subject, message):
mail_admins(subject, message)
|
Next, modify contact() view to use send_feedback_mail() function as follows:
djangobin/django_project/djangobin/views.py
1 2 3 4 5 6 7 8 9 10 11 12 13 14 15 16 17 18 19 20 21 22 23 24 25 26 27 28 29 | #...
from .tasks import send_feedback_mail
#...
def contact(request):
if request.method == 'POST':
f = ContactForm(request.POST)
if f.is_valid():
name = f.cleaned_data['name']
subject = "You have a new Feedback from {}:<{}>".format(name, f.cleaned_data['email'])
message = "Purpose: {}\n\nDate: {}\n\nMessage:\n\n {}".format(
dict(f.purpose_choices).get(f.cleaned_data['purpose']),
datetime.datetime.now(),
f.cleaned_data['message']
)
send_feedback_mail.delay(subject, message)
messages.add_message(request, messages.INFO, 'Thanks for submitting your feedback.')
return redirect('djangobin:contact')
else:
f = ContactForm()
return render(request, 'djangobin/contact.html', {'form': f})
|
Restart the Celery worker for the changes to take effect and visit http://localhost:8000/contact/.
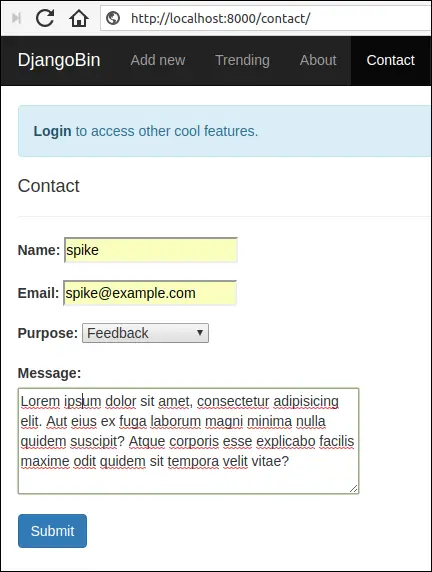
Fill the form and hit submit. This time, in the shell, running the Celery worker you will get an output like this:
1 2 3 4 5 6 7 8 9 10 11 12 13 14 15 16 17 18 19 | [2018-05-12 04:30:26,682: WARNING/ForkPoolWorker-2] send_feedback_mail
[2018-05-12 04:30:26,691: WARNING/ForkPoolWorker-2] Content-Type: text/plain; charset="utf-8"
MIME-Version: 1.0
Content-Transfer-Encoding: 7bit
Subject: [Django] You have a new Feedback from spike:<spike@example.com>
From: infooveriq@gmail.com
To: admin@overiq.com
Date: Sat, 12 May 2018 04:30:26 -0000
Message-ID: <20180512043026.10707.30774@pc>
Purpose: Feedback
Date: 2018-05-12 04:30:26.644238
Message:
Lorem ipsum dolor sit amet, consectetur adipisicing elit. Aut eius ex fuga laborum magni minima nulla quidem suscipit? Atque corporis esse explicabo facilis maxime odit quidem sit tempora velit vitae?
[2018-05-12 04:30:26,692: WARNING/ForkPoolWorker-2]
-----------------------------------------------------------------------------------------
|
Removing Snippets via Periodic Tasks #
In this section, we will add a periodic task to delete the expired snippets from the database.
Open tasks.py and add remove_snippets() function towards the end of the file as follows:
1 2 3 4 5 6 7 8 9 10 11 12 13 14 15 16 17 18 19 20 21 22 23 24 25 26 27 28 29 30 31 32 33 34 35 36 37 38 39 | #...
from django.utils.http import urlsafe_base64_encode
from django.conf import settings
import datetime, pytz
from .models import Snippet
from .utils import Preference as Pref
#...
@task
def remove_snippets():
# loop through all the snippets whose expiration is other than never.
for s in Snippet.objects.exclude(expiration='never').order_by('id'):
# get the creation time
creation_time = s.created_on
if s.expiration == Pref.SNIPPET_EXPIRE_1WEEK:
tmdelta = datetime.timedelta(days=7)
elif s.expiration == Pref.SNIPPET_EXPIRE_1MONTH:
tmdelta = datetime.timedelta(days=30)
elif s.expiration == Pref.SNIPPET_EXPIRE_6MONTH:
tmdelta = datetime.timedelta(days=30*6)
elif s.expiration == Pref.SNIPPET_EXPIRE_1YEAR:
tmdelta = datetime.timedelta(days=30*12)
# deletion_time is datetime.datetime
deletion_time = creation_time + tmdelta
# now is datetime.datetime
now = datetime.datetime.now(pytz.utc)
# diff is datetime.timedelta
diff = deletion_time - now
if diff.days == 0 or diff.days < 0:
# it's time to delete the snippet
s.delete()
|
The function starts with a for loop which iterates over snippets whose
expirationattribute contains a value other thannever.In lines 19-26, we use
if-elifstatement to create adatetime.timedeltaobject. Thedatetime.timedeltaobject is used to perform basic arithmetic ondatetime.datetimeanddatetime.dateobjects. If we add adatetime.timedeltaobject to adatetime.datetimeobject, the result will be a newdatetime.datetimeobject. On the other hand, if we subtract twodatetime.datetimeobjects, the result will be adatetime.timedelta.In line 29, we calculate snippet expiration time by adding snippet creation time and timedelta.
In line 32, we use
now()method ofdatetime.datetimeclass to get the current date and time.In line 35, we calculate the difference between
deletion_timeandnow. The difference yields a newdatetime.timedeltaobject. If thedaysattribute of thedatetime.timedeltais0or negative then it's time to delete the snippet, this exactly what we are doing in the if statement in line 37.
We have defined a periodic task. To execute it we use something called Celery beat. The Celery beat is a scheduler which kicks off at regular intervals to execute tasks.
Celery beat reads periodic tasks from beat_schedule setting. Open celery.py and define beat_schedule setting as follows:
1 2 3 4 5 6 7 8 9 10 11 12 13 14 15 16 | from __future__ import absolute_import, unicode_literals
import os
from celery import Celery
from celery.schedules import crontab
#...
# Load task modules from all registered Django app configs.
app.autodiscover_tasks()
app.conf.beat_schedule = {
'remove-snippets-daily-at-midnight': {
'task': 'djangobin.tasks.remove_snippets',
'schedule': crontab(minute=0, hour=0),
},
}
|
The task field refers to the name of the task to execute and the schedule field refers to the frequency of execution. The crontab(minute=0, hour=0) indicates that the
remove_snippets task will be run daily at midnight. We can pass many other arguments to crontab instance, this page shows some examples.
To start the celery beat scheduler type the following command:
$ celery -A django_project beat -l info
The output will be something like this:
1 2 3 4 5 6 7 8 9 10 11 | celery beat v4.1.0 (latentcall) is starting.
__ - ... __ - _
LocalTime -> 2018-04-24 12:01:51
Configuration ->
. broker -> amqp://guest:**@localhost:5672//
. loader -> celery.loaders.app.AppLoader
. scheduler -> celery.beat.PersistentScheduler
. db -> celerybeat-schedule
. logfile -> [stderr]@%INFO
. maxinterval -> 5.00 minutes (300s)
[2018-04-24 12:01:51,184: INFO/MainProcess] beat: Starting...
|
It is important to note that this command only starts the scheduler. To execute the tasks you'd have to start the Celery worker on a separate terminal:
$ celery -A django_project worker -l info
You can also start Celery worker along with beat using -B option:
$ celery -A django_project worker -l info -B
Now the expired snippets will be deleted automatically at midnight daily.
Monitoring Tasks using Flower #
Flower is a web-based tool for monitoring and administering celery. To install Flower type the following command:
$ pip install flower
To launch the web-based tool type the following:
$ celery -A django_project flower
By default, this command starts a web server at post 5555. To change the port use --port option.
$ celery -A django_project flower --port=5555
Open your browser and navigate to http://localhost:5555/. You should see a dashboard like this:

Load Comments