Flatpages in Django
Last updated on July 27, 2020
Web applications often contain pages which don't change frequently. For example, About Us, EULA (End User License Agreement), Terms of Use, etc. Such pages are known as flatpages. Django provides a built-in app named django.contrib.flatpages for handling flatpages.
Installing Flatpages App #
The flatpages app (django.contrib.flatpages) is not enabled by default. To install it open settings.py file and add django.contrib.flatpages to the INSTALLED_APPS list as follows:
djangobin/django_project/django_project/settings.py
1 2 3 4 5 6 7 8 9 10 11 12 13 14 15 | #...
INSTALLED_APPS = [
'django.contrib.admin',
'django.contrib.auth',
'django.contrib.contenttypes',
'django.contrib.sessions',
'django.contrib.messages',
'django.contrib.staticfiles',
'django.contrib.humanize',
'django.contrib.flatpages'
'djangobin',
]
#...
|
The flatpages app depends upon another app called Sites framework (django.contrib.sites) which is also not enabled by default. To enable sites framework add django.contrib.sites to the INSTALLED_APPS setting and define a SITE_ID variable with the value of 1 at the end of the settings.py file.
djangobin/django_project/django_project/settings.py
1 2 3 4 5 6 7 8 9 10 11 12 13 14 15 16 17 18 19 20 | #...
INSTALLED_APPS = [
'django.contrib.admin',
'django.contrib.auth',
'django.contrib.contenttypes',
'django.contrib.sessions',
'django.contrib.messages',
'django.contrib.staticfiles',
'django.contrib.humanize',
'django.contrib.flatpages',
'django.contrib.sites',
'djangobin',
]
#...
LOGIN_URL = 'djangobin:login'
SITE_ID = 1
|
Now run migrate command as usual to create necessary tables.
$ ./manage.py migrate
Operations to perform:
  Apply all migrations: admin, auth, contenttypes, djangobin, flatpages, sessions, sites
Running migrations:
  Applying sites.0001_initial... OK
  Applying flatpages.0001_initial... OK
  Applying sites.0002_alter_domain_unique... OK
The Flatpage Model #
The flatpages are represented using FlatPage model in the database. Here is is how the FlatPage model looks like:
1 2 3 4 5 6 7 8 | class FlatPage(models.Model):
url = models.CharField(maxlength=100)
title = models.CharField(maxlength=200)
content = models.TextField(blank=True)
enable_comments = models.BooleanField(default=False)
template_name = models.CharField(maxlength=70, blank=True)
registration_required = models.BooleanField(default=False)
sites = models.ManyToManyField(Site)
|
Let's examine each field one by one.
url(required): This field represents the URL where flatpage will appear. It can only take URL which begins and end with leading and trailing slash. For example,/about/,/eula/,/about-us/etc.title(required): Title of the flatpage.content(optional): Content of the flatpage in HTML.enable_comments(optional): ABooleanfield which designates whether you want to enable comments for the flatpage or not. Note that setting this field toTruewill not automatically create comment box in the flatpage. If you want to have a comment form you have to code it yourself. We only use this field as a flag in templates to check whether comments are enabled for a flatpage or not.template_name(optional): template to use for rendering flatpages. If not given it will fall back to default templateflatpages/default.html.registration_required(optional): ABooleanfield, if set toTruethen only logged in users will be able to view the flatpage.sites(required): This field is very important. Every flatpage is associated with a site using many-to-many relationship. In other words, aFlatPageobject can belong to one or moreSiteobject.
Sites Framework #
Sites framework (django.contrib.sites) allows us to run multiple websites from same database and Django project. Sites framework provides a model called Site which contains the following two fields:
- domain
- name
domain - It is used to specify the is the address of the website. For example, example.com or http://example.com.
name - This field is commonly used to specify a human-readable easy to remember the name of the site.
While enabling sites framework we have defined SITE_ID variable with the value of 1 because this is our first site.
Django automatically adds a record with domain and name field set to example.com, when we run migrate command after adding django.contrib.sites to INSTALLED_APPS in settings.py file.
That's all you need to know about the sites framework.
Having learned the anatomy of flatpages, let's create some flatpages. At this point, there are two ways to create flatpages.
- Django admin site.
- Django ORM.
Let's try creating flatpages via Django admin site.
Creating flatpages using Django admin site #
Visit http://127.0.0.1:8000/admin/ and login into the Django admin site.
You should see Flat Page and Sites listed with all the other installed apps as follows:
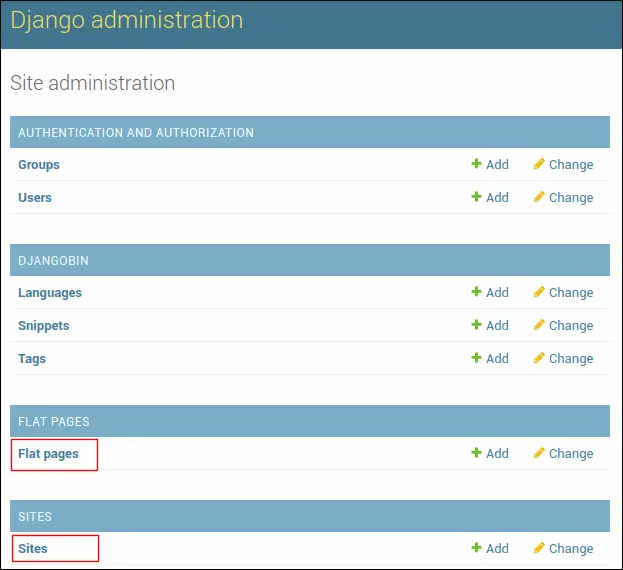
Click the "Add" link in front of Flat Page to create a new FlatPage. You should see Add flat page form like this:
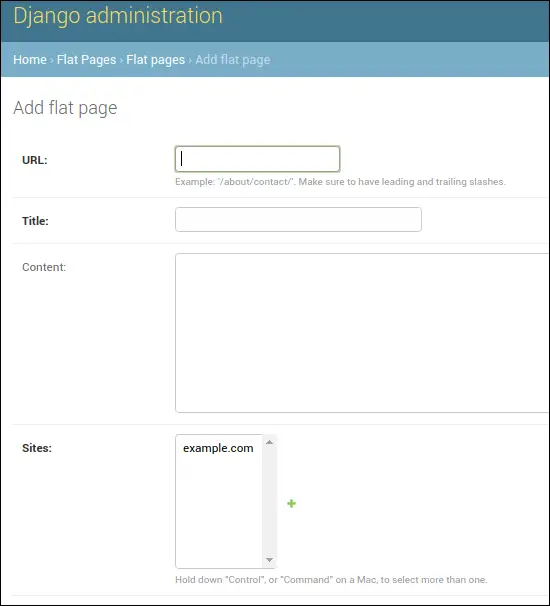
Create an "About" page by entering the following details:
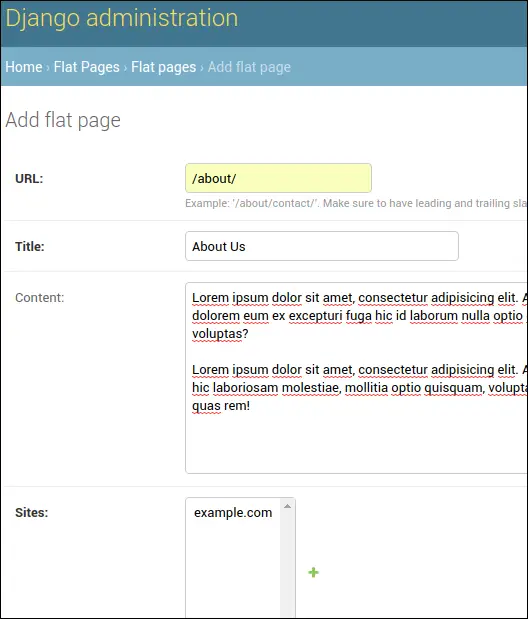
As discussed, the url, title and sites fields are required.
Notice Advanced options section at the bottom of the form. Click on the Show link to make it visible. The Advanced section allows you to set values for the following fields:
registration_requiredtemplate_name
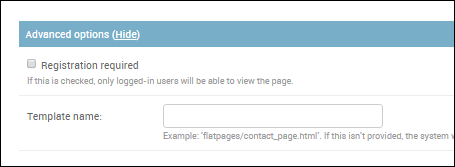
We don't need to enter any data into these fields for now.
Once you are done hit Save button at the bottom of the page.
Creating flatpages using Django ORM #
Flatpages are implemented as FlatPage model. To use FlatPage model we have to first import it from django.contrib.flatpages.models module as follows:
from django.contrib.flatpages.models import FlatPage
At this point, we have a single flatpage named "About" in our database. To get it inside the shell, type the following code:
1 2 3 4 5 6 7 8 9 10 11 12 13 14 15 16 | >>>
>>> au = FlatPage.objects.get(title='About Us')
>>>
>>> au.url
'/about/'
>>>
>>> au.title
'About Us'
>>>
>>> au.content
'Lorem ipsum dolor sit amet, consectetur adipisicing elit. Adipisci aspernatur beatae cumque delectus dolorem eum ex excepturi fuga hic id laborum nulla optio quam, quasi, quidem quod totam vero voluptas?\r\n\r\nLorem ipsum dolor sit amet, consectetur adipisicing elit. At autem culpa debitis distinctio, dolore fugiat hic laboriosam molestiae, mollitia optio quisquam, voluptate. At dignissimos dolore fuga iusto mollitia quas rem!'
>>>
>>> au.sites.all()
<QuerySet [<Site: example.com>]>
>>>
>>>
|
Let's create an EULA page.
1 2 3 4 5 6 7 8 9 10 11 | >>>
>>> eula = FlatPage.objects.create(
... url='/eula/',
... title = "EULA",
... content = "EULA for Djangobin"
... )
>>>
>>> eula
<FlatPage: /eula/ -- EULA>
>>>
>>>
|
Now we have two flat pages "About" and "EULA". Unlike About page, EULA page is not usable at this point because it is not associated with any Site object. Consider the following:
1 2 3 4 5 6 7 8 | >>>
>>> au.sites.all()
<QuerySet [<Site: example.com>]>
>>>
>>> eula.sites.all()
<QuerySet []>
>>>
>>>
|
The above code demonstrates that our "About" page is associated with one site (i.e example.com), However, "EULA" page is associated with none.
To make EULA flatpage usable, connect it to a Site object as follows:
1 2 3 4 5 6 7 8 9 10 11 12 13 14 | >>>
>>> from django.contrib.sites.models import Site # import Site model
>>>
>>> site = Site.objects.get(id=1) # get the site object
>>>
>>> site
<Site: example.com>
>>>
>>> eula.sites.add(site)
>>>
>>> eula.sites.all()
<QuerySet [<Site: example.com>]>
>>>
>>>
|
Creating template for flatpages #
We now have two flatpages but no way of displaying them. By default, a FlatPage object uses flatpages/default.html template unless you specify a different one while creating/updating a FlatPage object.
Django doesn't supply flatpages/default.html template, so you have to create one yourself. In the djangobin's templates directory, create a new directory named flatpages. Then inside the flatpages directory create a new file called default.html and add the following code to it.
djangobin/django_project/blog/templates/flatpages/default.html
1 2 3 4 5 6 7 8 9 10 11 12 13 | {% extends 'djangobin/base.html' %}
{% block title %}
{{ flatpage.title }} - {{ block.super }}
{% endblock %}
{% block main %}
<h1>{{ flatpage.title }}</h1>
<p>{{ flatpage.content|linebreaks }}</p>
{% endblock %}
|
Notice the flatpage variable used in the template. All flatpage templates are passed a context variable named flatpage which is a FlatPage object. Once we have the FlatPage object we can access any relevant information by typing a (.) dot followed by the attribute name. In our case, we are only outputting the value of title and content attribute of the FlatPage object.
URL Pattern #
Everything is in place now. We just need some URL patterns to access the flatpages. Open djangobin's urls.py and add the following two URL patterns at the end of the urlpatterns's list.
djangobin/django_project/blog/urls.py
1 2 3 4 5 6 7 8 9 10 11 | #...
from django.contrib.flatpages import views as flat_views
from . import views
#...
urlpatterns = [
#...
url('^search/$', views.search, name='search'),
url(r'^about/$', flat_views.flatpage, {'url': '/about/'}, name='about'),
url(r'^eula/$', flat_views.flatpage, {'url': '/eula/'}, name='eula'),
]
|
The flatpage app (django.contrib.flatpages) provides a flatpage() view whose job is to render the flatpages. It accepts a required argument called url which is the URL of the template we entered while creating the flatpage.
Open djangobin's base.html and add links to About and EULA page as follows:
djangobin/django_project/djangobin/templates/djangobin/base.html
1 2 3 4 5 6 7 8 9 10 11 12 13 14 15 16 17 18 19 20 21 22 23 24 25 26 27 28 29 30 | {# ... #}
<div class="collapse navbar-collapse" id="bs-example-navbar-collapse-1">
<ul class="nav navbar-nav">
<li {% if request.path == '/' %}class='active'{% endif %} >
<a href="{% url 'djangobin:index' %}">Add new</a>
</li>
<li {% if request.path == '/trending/' %}class='active'{% endif %}>
<a href="{% url 'djangobin:trending_snippets' %}">Trending<span class="sr-only">(current)</span></a>
</li>
<li {% if request.path == '/about/' %}class='active'{% endif %}>
<a href="{% url 'djangobin:about' %}">About</a>
</li>
<li {% if request.path == '/contact/' %}class='active'{% endif %}>
<a href="{% url 'djangobin:contact' %}">Contact</a>
</li>
</ul>
{# ... #}
<div class="main-footer">
<div class="container text-center">
<ul>
<li><a href="#">Source Code</a></li>
<li><a href="https://overiq.com/">OverIQ</a></li>
<li><a href="{% url 'djangobin:eula' %}">EULA</a></li>
</ul>
</div>
</div>
</footer>
{# ... #}
|
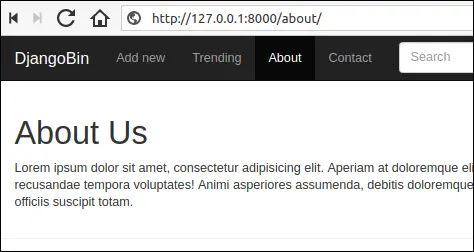
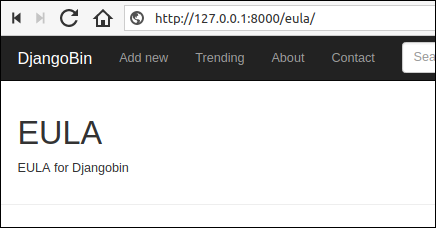
Open your browser and visit http://127.0.0.1:8000/about/ and http://127.0.0.1:8000/eula/. You should see About and EULA page as follows:
Load Comments