Django Creating Users using UserCreationForm
Last updated on July 27, 2020
Django authentication framework provides a form named UserCreationForm (which inherits from ModelForm class) to handle the creation of new users. It has three fields namely username, password1 and password2 (for password confirmation). To use UserCreationForm you have to first import it from django.contrib.auth.forms as follows:
from django.contrib.auth.forms import UserCreationForm
Unfortunately, Django doesn't provide any view to handle the creation of users, so we have to create our own view.
In the cadmin app's urls.py add the following URL pattern at the beginning of the urlpatterns list.
TGDB/django_project/cadmin/urls.py
1 2 3 4 5 6 7 8 9 10 | #...
urlpatterns = [
url(r'^register/$', views.register, name='register'),
url(r'^password-change-done/$',
auth_views.password_change_done,
{'template_name': 'cadmin/password_change_done.html'},
name='password_change_done'
),
#...
]
|
Create a view function called register() in cadmin's views.py as follows:
TGDB/django_project/cadmin/views.py
1 2 3 4 5 6 7 8 9 10 11 12 13 14 15 16 17 18 19 20 21 | #...
from django.contrib.auth.decorators import login_required
from django.contrib import messages
from django.contrib.auth.forms import UserCreationForm
#...
def login(request, **kwargs):
#...
def register(request):
if request.method == 'POST':
f = UserCreationForm(request.POST)
if f.is_valid():
f.save()
messages.success(request, 'Account created successfully')
return redirect('register')
else:
f = UserCreationForm()
return render(request, 'cadmin/register.html', {'form': f})
|
Next, create a new template register.html in cadmin app with the following code:
TGDB/django_project/cadmin/templates/cadmin/register.html
1 2 3 4 5 6 7 8 9 10 11 12 13 14 15 16 17 18 19 20 21 22 23 24 25 26 27 28 29 30 31 32 33 | {% extends "cadmin/base.html" %}
{% block title %}
Create User - {{ block.super }}
{% endblock %}
{% block content %}
<div class="login">
{% if messages %}
<ul>
{% for message in messages %}
<li>{{ message }}</li>
{% endfor %}
</ul>
{% endif %}
<h1>Create account - The Great Django Blog</h1>
<form method="post" >
{% csrf_token %}
<table>
{{ form.as_table }}
<tr>
<td></td>
<td><input type="submit" name="submit" value="Register" /></td>
</tr>
</table>
</form>
</div>
{% endblock %}
|
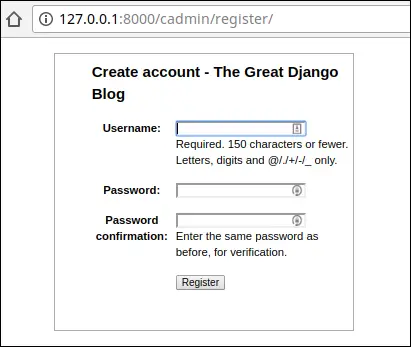
To view user registration form visit http://127.0.0.1:8000/cadmin/register/ and you will get a page like this.
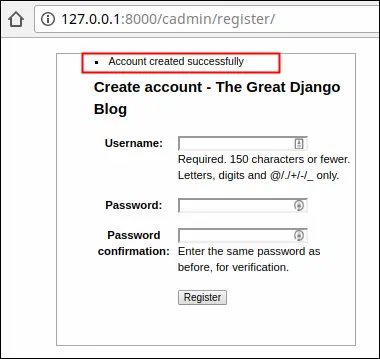
Create a new user by entering username and password. On success, you will be greeted with "Account created successfully" message.
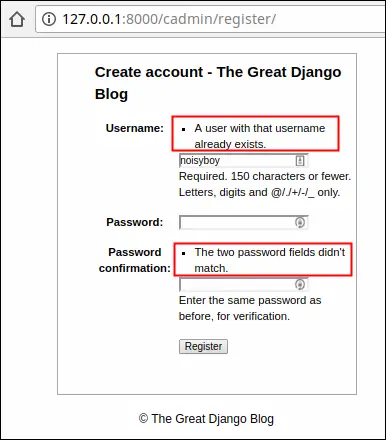
If entered username already exists or passwords don't match then the form will display errors like this:
It is important to note that user created using UserCreationForm will have is_superuser and is_staff set to False but is_active set to True.
The only drawback of UserCreationForm is that it doesn't have email field. As a result, we can't use it to send email verification to the user to verify the account.
Most of the time a user registration involves the following steps:
- The user fills the registration form and hit submit.
- The site sends an email verification link to the submitted email.
- User clicks on the activation link to verify the account.
At this point, we have two options:
- Extend the
UserCreationFormto include email field and email verification capability. - Create a completely new user registration form from scratch.
We will go with the second option because it allows us to control every aspect of user creation process. Further, it will also reinforce your understanding of working with the forms.
Let's create a new class called CustomUserCreationForm in cadmin's forms.py file and add the following code to it. If forms.py doesn't already exists create the file now.
TGDB/django_project/cadmin/forms.py
1 2 3 4 5 6 7 8 9 10 11 12 13 14 15 16 17 18 19 20 21 22 23 24 25 26 27 28 29 30 31 32 33 34 35 36 37 38 39 40 41 42 | from django.contrib.auth.forms import UserCreationForm
from django.contrib.auth.models import User
from django import forms
from django.core.exceptions import ValidationError
class CustomUserCreationForm(forms.Form):
username = forms.CharField(label='Enter Username', min_length=4, max_length=150)
email = forms.EmailField(label='Enter email')
password1 = forms.CharField(label='Enter password', widget=forms.PasswordInput)
password2 = forms.CharField(label='Confirm password', widget=forms.PasswordInput)
def clean_username(self):
username = self.cleaned_data['username'].lower()
r = User.objects.filter(username=username)
if r.count():
raise ValidationError("Username already exists")
return username
def clean_email(self):
email = self.cleaned_data['email'].lower()
r = User.objects.filter(email=email)
if r.count():
raise ValidationError("Email already exists")
return email
def clean_password2(self):
password1 = self.cleaned_data.get('password1')
password2 = self.cleaned_data.get('password2')
if password1 and password2 and password1 != password2:
raise ValidationError("Password don't match")
return password2
def save(self, commit=True):
user = User.objects.create_user(
self.cleaned_data['username'],
self.cleaned_data['email'],
self.cleaned_data['password1']
)
return user
|
Here we are defining four fields namely username, email, password1 and password2; with their own clean_<field_name>() method (except for password1 field). Pay close attention to the widget keyword argument in both the password fields. The widget keyword argument allows us to change the default widget of the field. Recall that by default, CharField is rendered as text field (i.e <input type="text" ... >). To render the CharField as password field we have set widget keyword argument to forms.PasswordInput.
The clean_username() and clean_email() methods check for duplicate username and email respectively. The clean_password2() method checks whether the password entered in both the fields matches or not. Finally, the save() method saves the data into the database.
Open cadmin's views.py file and update register() view to use CustomUserCreationForm.
TGDB/django_project/cadmin/views.py
1 2 3 4 5 6 7 8 9 10 11 12 13 14 15 16 17 | #...
from django.contrib.auth.forms import UserCreationForm
from .forms import CustomUserCreationForm
#...
def register(request):
if request.method == 'POST':
f = CustomUserCreationForm(request.POST)
if f.is_valid():
f.save()
messages.success(request, 'Account created successfully')
return redirect('register')
else:
f = CustomUserCreationForm()
return render(request, 'cadmin/register.html', {'form': f})
|
Our registration form is almost ready for now. Visit http://127.0.0.1:8000/cadmin/register/ to create some new users.
If account creation succeeds then you will get a success message as follows:
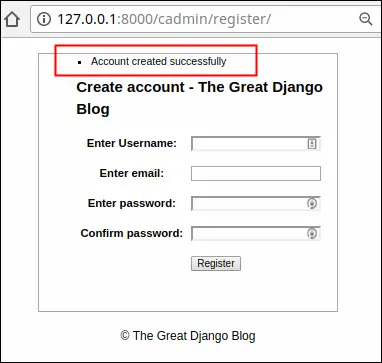
On the other hand, if CustomUserCreationForm encounters any errors. They will be displayed in the form as follows:
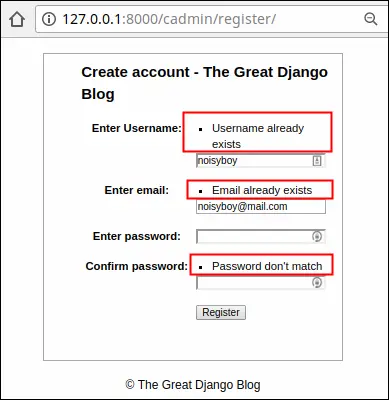
Notice that CustomUserCreationForm inherits from forms.Form class rather than forms.ModelForm. We have deliberately done this to show you everything we have learned about the forms is still applicable. If we wanted we could just easily use form.ModelForm instead of forms.Form. This is not the final version of the registration form, we will update this form in the upcoming chapter.
Another thing you might have noticed is that we haven't implemented email verification in our CustomUserCreationForm, the reason is that email verification requires us to store some additional data about the user. At this point, we have no way of storing additional data about the User. To do so, we have to extend our User model. We will see how it's done in the next chapter.
Note: To checkout this version of the repository type git checkout 32a.
Load Comments