Flatpages in Django
Last updated on July 27, 2020
Flatpages are simple static pages whose content do not change frequently. For example, flatpages are commonly used to create pages like About Us, EULA (End User License Agreement), Terms of Use, etc. Many beginners mistakenly believe that flatpages are stored as static HTML pages. That is far from true, just like everything, flatpages are also stored in the database.
Installing Flatpages App #
Flatpages app or django.contrib.flatpages is not enabled by default. To install flatpage app open settings.py file and add django.contrib.flatpages to the INSTALLED_APPS list as follows:
TGDB/django_project/django_project/settings.py
1 2 3 4 5 6 7 8 9 10 11 12 13 | #...
INSTALLED_APPS = [
'django.contrib.admin',
'django.contrib.auth',
'django.contrib.contenttypes',
'django.contrib.sessions',
'django.contrib.messages',
'django.contrib.staticfiles',
'django.contrib.flatpages',
'blog',
'cadmin',
]
#...
|
The flatpages app depends upon another app called Sites framework (django.contrib.sites) which is also not enabled by default. To enable sites framework add django.contrib.sites to the INSTALLED_APPS setting and define a SITE_ID variable with the value of 1 at the end of the settings.py file.
TGDB/django_project/django_project/settings.py
1 2 3 4 5 6 7 8 9 10 11 12 13 14 15 16 17 18 19 | #...
INSTALLED_APPS = [
'django.contrib.admin',
'django.contrib.auth',
'django.contrib.contenttypes',
'django.contrib.sessions',
'django.contrib.messages',
'django.contrib.staticfiles',
'django.contrib.flatpages',
'django.contrib.sites',
'blog',
'cadmin',
]
#...
LOGIN_URL = 'login'
SITE_ID = 1
|
Now run migrate command as usual to create necessary tables.
(env) C:\Users\Q\TGDB\django_project>python manage.py migrate
Operations to perform:
  Synchronize unmigrated apps: messages, staticfiles
  Apply all migrations: admin, sessions, sites, auth, contenttypes, flatpages
Synchronizing apps without migrations:
  Creating tables...
    Running deferred SQL...
  Installing custom SQL...
Running migrations:
  Rendering model states... DONE
  Applying sites.0001_initial... OK
  Applying flatpages.0001_initial... OK

(env) C:\Users\Q\TGDB\django_project>
The Flatpage Model #
A flatpage uses the FlatPage model to save data into the database. The Flatpage model is defined like this:
1 2 3 4 5 6 7 8 | class FlatPage(models.Model):
url = models.CharField(maxlength=100)
title = models.CharField(maxlength=200)
content = models.TextField(blank=True)
enable_comments = models.BooleanField(default=False)
template_name = models.CharField(maxlength=70, blank=True)
registration_required = models.BooleanField(default=False)
sites = models.ManyToManyField(Site)
|
Let's examine each field one by one.
url(required): This field represents the URL where flatpage will appear. It can only take URL which begins and end with leading and trailing slash. For example,/about/,/eula/,/about-us/etc.title(required): Title of the flatpage.content(optional): Content of the flatpage in HTML.enable_comments(optional): ABooleanfield which designates whether you want to enable comments for the flatpage or not. Note that setting this field toTruewill not automatically create comment form in the flatpage. If you want to have a comment form you have to code it yourself. We only use this field as a flag in templates to check whether comments are enabled for a flatpage or not.template_name(optional): template to use for rendering flatpages. If not given it will fall back to default templateflatpages/default.html.registration_required(optional): ABooleanfield, if set toTruethen only logged in users will be able to view the flatpage.sites(required): This field is very important. Every flatpage is associated with a site using many-to-many relationship. In other words, aFlatPageobject can belong to one or moreSiteobject.
Sites Framework #
Sites framework (django.contrib.sites) allows us to run multiple websites from same database and Django project. Sites framework provides a model called Site which contains the following two fields:
- domain
- name
domain - It is used to specify the is the address of the website. For example, example.com or http://example.com.
name - This field is commonly used to specify a human-readable easy to remember the name of the site.
While enabling sites framework we have defined SITE_ID variable with the value of 1 because this is our first site.
Django automatically adds a record with domain and name field set to example.com, when we run migrate command after adding django.contrib.sites to INSTALLED_APPS in settings.py file.
That's all you need to know about the sites framework.
Having learned the anatomy of flatpages, let's create some flatpages. At this point, there are two ways to create flatpages.
- Using Django Admin.
- Using Django ORM.
Let's try the Django Admin first.
Creating flatpages using Django Admin #
Visit http://127.0.0.1:8000/admin/ and login to Django Admin.
You should see Flat Page and Sites listed with all the other installed apps as follows:
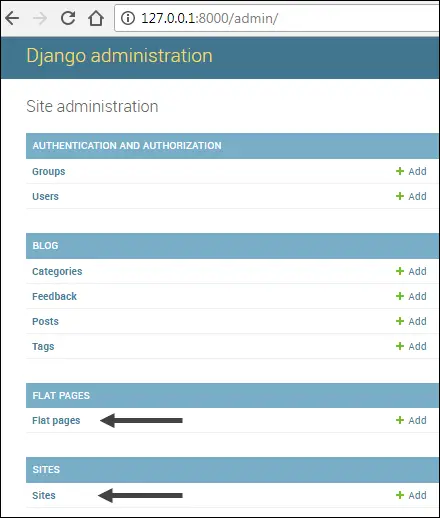
Click the "Add" link in front of Flat Page to create a new FlatPage. You should see a form like this:
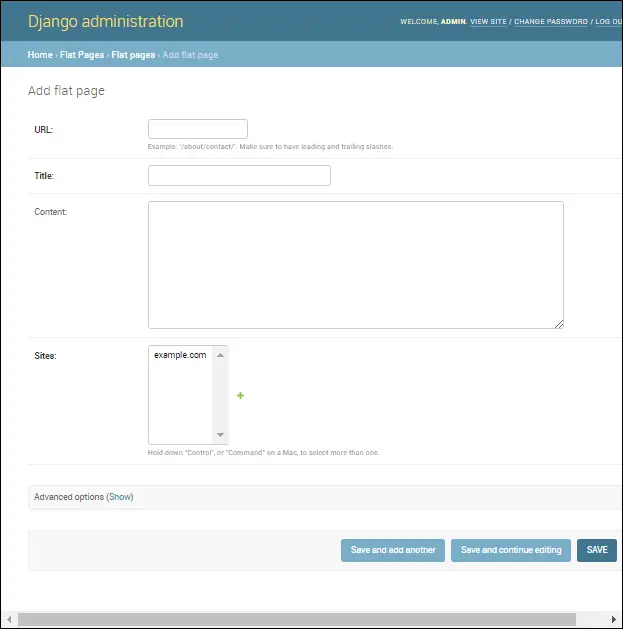
Create an "About" page by entering the following details:
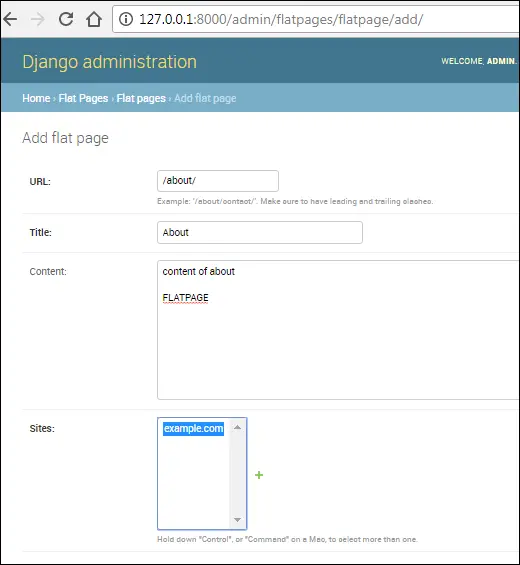
As discussed, the url, title and sites fields are required.
Notice Advanced options section at the bottom of the form. Click on the Show link to make it visible. The Advanced section allows you to set values to the following fields:
registration_requiredtemplate_name
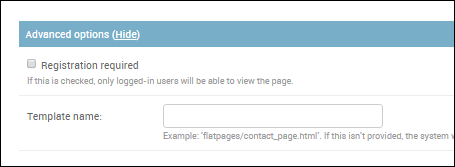
We don't need to enter any data into these fields for now.
Once you are done hit Save button at the bottom of the page.
Creating flatpages using Django ORM #
Flatpages are implemented as FlatPage model. To use FlatPage model we have to first import it from django.contrib.flatpages.models as follows:
from django.contrib.flatpages.models import FlatPage
At this point, we have an "About" flatpage object in our database. To get it inside the shell, type the following code:
1 2 3 4 5 6 | >>>
>>> FlatPage.objects.values()
<QuerySet [{'registration_required': False, 'template_name': '', 'title': 'About
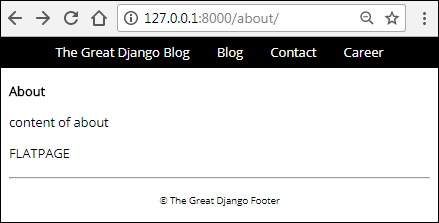
', 'id': 1, 'url': '/about/', 'enable_comments': False, 'content': 'content of a
bout\r\n\r\nFLATPAGE'}]>
>>>
|
Let's create an EULA page.
1 2 3 4 5 6 7 8 9 | >>>
>>> FlatPage.objects.create(
... url='/eula/',
... title = "EULA",
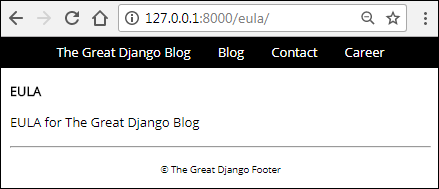
... content = "EULA for The Great Django Blog"
... )
<FlatPage: /eula/ -- EULA>
>>>
>>>
|
Now we have two flat pages "About" and "EULA". The important thing to note here is that our EULA flatpage is not usable at this point. We can't use a flatpage in anyway until we associate it with at last one Site object. Consider the following:
1 2 3 4 5 6 7 8 9 10 11 12 | >>>
>>> fp1 = FlatPage.objects.get(title="About")
>>> fp1
<FlatPage: /about/ -- About>
>>>
>>> fp1.sites.all()
[<Site: example.com>]
>>>
>>> fp2 = FlatPage.objects.get(title="EULA")
>>> fp2.sites.all()
<QuerySet []>
>>>
|
The above code demonstrates that our "About" page is associated with one site (i.e example.com), However, "EULA" page is associated with none.
To make EULA flatpage usable, connect it to a Site object as follows:
1 2 3 4 5 6 7 8 9 10 11 12 | >>>
>>> from django.contrib.sites.models import Site ## import Site model
>>>
>>> site = Site.objects.get(id=1) ## get the site object
>>> site
<Site: example.com>
>>>
>>> fp2.sites.add(site) ## connect it fp2 to site object using add() method
>>>
>>> fp2.sites.all()
[<Site: example.com>]
>>>
|
Creating template for flatpages #
We have two flatpages now but no way of displaying them. By default, a FlatPage object uses flatpages/default.html template unless you specify a different one while creating/updating a FlatPage object.
Django doesn't supply flatpages/default.html template, so you have to create one yourself. In the blog app's inside the templates directory, create a new directory named flatpages. Then inside the flatpages directory create a new file called default.html and add the following code to it.
TGDB/django_project/blog/templates/flatpages/default.html
1 2 3 4 5 6 7 8 9 10 11 12 13 14 15 16 17 18 19 20 21 | {% extends "blog/base.html" %}
{% block title %}
{{ flatpage.title }} - {{ block.super }}
{% endblock %}
{% block content %}
<div class="content">
<div class="section-inner clearfix">
<h1>{{ flatpage.title }}</h1>
<p>
{{ flatpage.content|linebreaks }}
</p>
</div>
</div>
{% endblock %}
|
Notice the template variables flatpage.title and flatpage.content. All flatpage templates are passed a context variable named flatpage which is an FlatPage object. Once we have FlatPage object we can access any relevant information by typing a (.) dot followed by the attribute name. In our case, we are only outputting the value of title and content attribute of the FlatPage object.
URL Pattern #
Everything is in place now. We just need some URL patterns to access the flatpages. Open blog's urls.py and add the following two URL patterns at the top of the urlpatterns's list.
TGDB/django_project/blog/urls.py
1 2 3 4 5 6 7 8 9 10 11 | #...
from . import views
from django.contrib.flatpages import views as flat_views
#...
urlpatterns = [
url(r'^about/$', flat_views.flatpage, {'url': '/about/'}, name='about'),
url(r'^eula/$', flat_views.flatpage, {'url': '/eula/'}, name='eula'),
url(r'^login/$', views.login, name='blog_login'),
#...
]
|
The flatpage app (django.contrib.flatpages) provides a flatpage() view whose job is to render the flatpages. It accepts a required argument called url which is the URL of the template we entered while creating the flatpage.
Now visit http://127.0.0.1:8000/about and http://127.0.0.1:8000/eula you will be greeted with about and EULA flatpages respectively.
Note: To checkout this version of the repository type git checkout 34a.
Load Comments