Views and URLconfs in Django
Last updated on July 27, 2020
In the previous chapters, we have learned how to set up a Django project and run the development server. In this chapter, we will learn the basics of creating dynamic web pages in Django.
Creating the first View #
Let's start simple. In this section, we will create a web page that outputs "Hello Django". To do this open views.py located in the blog app (i.e TGDB/django_project/blog) in your favorite text editor.
At this point, views.py should look like this:
TGDB/django_project/blog/views.py
1 2 3 | from django.shortcuts import render
# Create your views here.
|
Delete everything and enter the following code.
TGDB/django_project/blog/views.py
1 2 3 4 5 | from django.http import HttpResponse
def index(request):
return HttpResponse("Hello Django")
|
We have just created a simple view function.
So what's a view function?
A function whose job is to accept a request and return a proper response.
Let's step through the code we have added one line at a time.
- In line 1, we are importing
HttpResponseclass fromdjango.httpmodule. - In lines 4-5, we are defining
index()function which returns an instance ofHttpResponseobject.
The important thing to remember about the view function is that every view function must accept a parameter called request by convention, which is an object of type HttpRequest. Certainly, you can call this parameter anything you want, however, it is highly recommended not to change it. The HttpRequest object contains the information about the current web request that has triggered this view.
Every view function must return a HttpResponse object. To create a HttpResponse object, simply pass a string representing the content of the page to HttpResponse().
Now we have created a simple view. To call this view you must create a URL pattern in the URL Configuration or URLconf in short. You can think of URLconf as a table of contents for Django powered web app. In other words, URLconf is a mapping between URLs and view functions that should be called for those URLs. It is Django's way of saying for this URL call this view function and for that URL call that view function and so on.
We create URL pattern using url() function. It accepts two arguments, a regular expression to match the URL and name of the view function to call for this URL.
Let's create a URL pattern. Open urls.py located in the Django Project Configuration directory (i.e
TGDB/django_project/django_project). This file is also known as sitewide urls.py. The contents of urls.py file should look like this.
TGDB/django_project/django_project/urls.py
1 2 3 4 5 6 | from django.conf.urls import url
from django.contrib import admin
urlpatterns = [
url(r'^admin/', admin.site.urls),
]
|
Note: Comments are removed from the above code snippet to save space.
To tell the existence of index() view function in urls.py you need to do two things:
- Add
from blog import viewstowards the end of the import list. Create a new URL pattern by adding the following line at the beginning of the
urlpatternslist.url(r'^$', views.index),
The contents of the urls.py file should now look like this:
TGDB/django_project/django_project/urls.py
1 2 3 4 5 6 7 8 | from django.conf.urls import url
from django.contrib import admin
from blog import views
urlpatterns = [
url(r'^$', views.index),
url(r'^admin/', admin.site.urls),
]
|
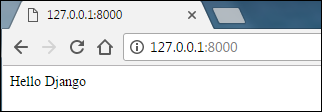
Start the Django development server if not already running using python manage.py runserver command and visit http://127.0.0.1:8000/. You should see a page like this:
The first parameter to url() is a regular expression string and the second is the name of the view function. The regular expression r'^$' matches nothing. In other words, r'^$' refers to the root of the website. If our domain is http://example.com/ then a request to http://example.com/ will call index() view function. When a user requests http://example.com/ Django uses urlpatterns list to figure out which method to call. When it finds the URL pattern that matches, it calls the view function associated with that pattern. If a matching pattern is not found, an HTTP 404 error is returned.
Don't forget what Django calls view is actually a controller.
The url() function accepts many other optional parameters, one such parameter is name keyword argument. The name keyword argument allows us to give a unique name to the URL pattern. So why should we give names to our URL patterns? Defining a name allows us to create URLs automatically in our templates and views. We will see how it's done in the lesson Creating URLs in Django. For now, let's give a name to our newly created URL pattern.
TGDB/django_project/django_project/urls.py
1 2 3 4 5 | #...
urlpatterns = [
url(r'^$', views.index, name='blog_index'),
url(r'^admin/', admin.site.urls),
]
|
Django 404 Errors #
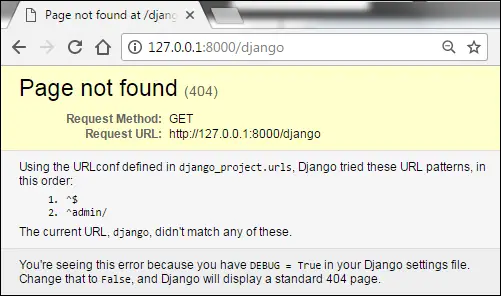
Our URLconf at this point contains only two URL patterns - one was provided by Django and the one which we wrote ourself. So what would happen if you request a different URL? Open your browser and try visiting http://127.0.0.1:8000/django. If the requested URL doesn't match to any of the URL patterns in URLconf then Django throws a 404 error. As the requested URL is not defined in the URLconf, Django throws an HTTP 404 not found error. Here is how it looks:
The important thing to note about this page is that it gives way lot more information than it is required. Notice that it exactly tells what URL patterns Django tried from which URLconf before throwing HTTP 404 error. Sure, this is sensitive information and should be disclosed only to the people involved in the development of the web app.
So, If this information is sensitive then why Django is revealing all this in the first place?
Because by default Django project installed with DEBUG set to True. To view this setting open settings.py in Django project configuration directory located at TGDB/django_project/django_project.
TGDB/django_project/django_project/settings.py
1 2 3 4 | #...
# SECURITY WARNING: don't run with debug turned on in production!
DEBUG = True
#...
|
Notice that DEBUG is set to True.
To turn off the debug mode set the value of DEBUG to False. When debug mode is off Django outputs a different HTTP 404 response without any sensitive information. As we are currently in the development phase keep the DEBUG setting to True.
Mapping URLs the right way #
Right now, we only have one application namely blog in our Django project. Generally, a project consists of at least 3-4 apps. If we keep writing URLconf for every app in the sitewide urls.py file soon it would become a mess. So instead of mappings the URLs directly to project's urls.py, we can make our application modular by creating urls.py for every application, that way we can manage URLs much more efficiently and easily. To do so, first create urls.py file inside the blog app and add the following code to it.
TGDB/django_project/blog/urls.py
1 2 3 4 5 6 | from django.conf.urls import url
from blog import views
urlpatterns = [
url(r'^$', views.index, name='blog_index'),
]
|
In line 1 and 2, we are importing necessary function and module. In line 4, we are creating URLconf for the blog app.
The next step is to inform the Django project about the URLconf of the blog app. To do so, modify the sitewide urls.py as follows:
TGDB/django_project/django_project/urls.py
1 2 3 4 5 6 7 | from django.conf.urls import url, include
from django.contrib import admin
urlpatterns = [
url(r'^blog/', include('blog.urls')),
url(r'^admin/', admin.site.urls),
]
|
The include() function tells sitewide urls.py file about the existence of urls.py in the blog app. The important thing to note here is that in the regular expression r'^blog/' doesn't have a trailing $ character instead it has a trailing slash /. This is done so because whenever Django encounters include() function, it chops off whatever the part of the URL matches up to that point and sends the remaining part of the URL to the included URLconf for further processing.
Open your browser and navigate to http://127.0.0.1:8000/blog/. Django will greet you with "Hello Django" response.
Digging deep into the URLs #
Let's see what happens when you request a page.
When you request a page the first thing Django does is to remove the host portion of the URL, for example: in the URL
https://overiq.com/contact/the host portion isoveriq.com.Then, Django reads value of variable
ROOT_URLCONFfrom Django project'ssettings.pyfile. So what's the role ofROOT_URLCONF?ROOT_URLCONFcontains the URLconf which must be loaded first. It is also known as root URLconf or sitewide URLconf. In our case it points tourls.pylocated inTGDB/django_project/django_project.ROOT_URLCONF = 'django_project.urls'
After reading
ROOT_URLCONF, Django checks each URL pattern one by one in the root URLconf with the requested URL until a match is found. If a pattern is not found a 404 error is returned.On the other hand, If a pattern is found then it calls the associated view function. If the second parameter to the
url()function includes a call toinclude()function then Django chops off whatever the part of the URL matches up to that point and sends the remaining part of the URL to the included URLconf for further processing.
Consider the following example:
Let's say the requested URL is http://example.com/time/, the first thing Django does is to remove the host portion of the URL. After stripping host portion http://example.com/time/ becomes /time/. The string /time/ is then checked against each URL pattern one by one, until a match is found. If a match is found corresponding view function is called. Otherwise, an HTTP 404 error is returned.
Outputting Dynamic Data #
The view function we created in the above section was very simple, nonetheless, it introduced you to some basics concepts like view functions, URL patterns and how Django processes the URLs behind the scene. In our next view, we will output some dynamic content. Let's create a simple web page to output current date and time. If you have done some Python programming then you may already know that Python has datetime module for working with date and time. Here is a quick refresher on how to use it:
1 2 3 4 5 6 7 8 | >>>
>>> import datetime
>>> current_datetime = datetime.datetime.now()
>>> current_datetime
datetime.datetime(2017, 1, 24, 13, 59, 42, 135163)
>>> print(current_datetime)
2017-01-24 13:59:42.135163
>>>
|
It is important to note that above the snippet is pure Python and it has nothing to do with Django. To return current date and time we first have to create a new view. Open views.py in the blog app and add a new view function called today_is() below index() view function as follows:
TGDB/django_project/blog/views.py
1 2 3 4 5 6 7 8 9 10 11 12 | from django.http import HttpResponse
import datetime
def index(request):
return HttpResponse("Hello Django")
def today_is(request):
now = datetime.datetime.now()
html = "<html><body>Current date and time: {0}</body></html>".format(now)
return HttpResponse(html)
|
Let's step through the changes we have made in the views.py file:
In line 2, we have added an import statement to import
datetimemodule, so that we can calculate current date and time.In lines 9-12, we have defined
today_is()function. In line 10, we are calculating current date and time by callingnow()method and assigning the result to thenowvariable. In line 11, we are creating an HTML response using string object'sformat()method. The{0}inside the string is just a placeholder for the current date and time and will be replaced by the value of the variablenow. It is important to note that the variablenowrepresents adatetime.datetimeobject not a regular string but when the value ofnowis printed inside the string in place of{0}, the__str__()method ofdatatime.datetimeobject convertsdatatime.datetimeobject to a string. Finally, the view returns anHttpResponse()object containing the generated response.
With view function in place, let's create a new URL pattern to call this view. Open blog app's urls.py and add the following URL pattern to call today_is() view function as follows:
TGDB/django_project/blog/urls.py
1 2 3 4 5 6 7 | from django.conf.urls import url
from blog import views
urlpatterns = [
url(r'^time/$', views.today_is, name='todays_time'),
url(r'^$', views.index, name='blog_index'),
]
|
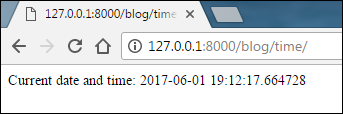
We have added a new URL pattern to map /time/ URL to the today_is() view function. At this point, you are probably getting the hang of this. Start the server if not already running and visit http://127.0.0.1:8000/blog/time/. If everything went fine Django will greet you with current date and time.
Views Limitation #
So far we have been able to pull off a basic app using just using View part of the MTV pattern. But still our app is severely limited because of following reasons:
We are hardcoding HTML code inside our views. At a later date, if we want to modify our HTML it would be very painful to go through each view one by one to modify the page. Django comes bundled with a powerful templating system which allows us to create complex HTML pages easily instead of hardcoding them inside views. If we keep hardcoding HTML directly in the view we wouldn't be able to use loops or conditional statements that Django templating system provides inside our HTML (we will see how to use them in Template tags in Django lesson).
In the real world, a page consists of many dynamic components. Embedding dynamic content in a large page using
format()method is very error-prone and tedious.At this point, we haven't yet introduced database into the scene because it would create more mess.
In the upcoming chapters, you will see how using Models and Templates in conjunction with Views helps us to greatly simplify all the above-mentioned issues.
Note: To checkout this version of the repository type git checkout 5a.
Load Comments