Templates in Flask
Last updated on July 27, 2020
Up until now, we have been hardcoding HTML strings directly in our view functions. Although this approach is fine for demonstration purpose, it doesn't fit very well when it comes to building real-world applications. Most web-pages these days are quite long and consists of many dynamic components. Rather than having large blocks of HTML strings embedded in view functions (which would be terrible to maintain), we use Templates.
Templates #
A template is just a text file which contains static HTML code as well as some special markup denoting dynamic content that will be known at the time of the request. The process which replaces the dynamic markup and generates flat HTML page is known as template rendering. Flask comes bundled with a template engine called Jinja which does the actual job of parsing templates and converting them to flat HTML page.
Jinja template engine is one of the most powerful and popular template engines available for Python. If you have ever used Django templates, then you will feel at home. It is important to note that Jinja and Flask are two separate packages and can be used independently.
Rendering templates using render_template() #
By default, Flask looks for templates in the subdirectory named templates inside the application folder. We can change this default behavior by passing template_folder argument to the Flask constructor at the time of creating application instance.
app = Flask(__name__, template_folder="jinja_templates")
This code changes the default location of templates to jinja_templates directory inside the application directory. For now, we don't have any reason to do that, so we will keep using the default templates directory for storing templates.
Create a new directory named templates inside flask_app application directory. Inside the templates directory create a template named index.html with the following code:
flask_app/templates/index.html
1 2 3 4 5 6 7 8 9 10 11 12 | <!DOCTYPE html>
<html lang="en">
<head>
<meta charset="UTF-8">
<title>Title</title>
</head>
<body>
<p>Name: {{ name }}</p>
</body>
</html>
|
Notice that in addition to bare-bone HTML the template has one dynamic component marked as {{ name }}. The name inside double curly braces {{ }} represent a variable whose value will be specified at the time of rendering the template. Let's say the value of name is Jerry then after rendering the template you will get the following HTML.
1 2 3 4 5 6 7 8 9 10 11 12 | <!DOCTYPE html>
<html lang="en">
<head>
<meta charset="UTF-8">
<title>Title</title>
</head>
<body>
<p>Name: Jerry</p>
</body>
</html>
|
Flask provides a function called render_template() for rendering Templates. It is this function which integrates Jinja with Flask. To render a template we call render_template() with the template name along with the data you want to pass to the template as keyword arguments. The render_template() function renders the template and returns HTML as a string. The keyword arguments we pass to the template is known as the context of the template or simply template context. The following listing shows how to render index.html template using the render_template() (changes are highlighted).
flask_app/main2.py
1 2 3 4 5 6 7 | from flask import Flask, request, render_template
app = Flask(__name__)
@app.route('/')
def index():
return render_template('index.html', name='Jerry')
#...
|
Note that name in name='Jerry' refers to the variable referenced in the template index.html.
If you now visit http://localhost:5000/, you will get the following response:
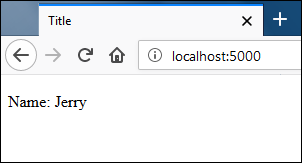
In case you have quite a few arguments to pass to the render_template() then instead of separating them using comma (,) create a dictionary and apply ** operator on it to deliver the keyword arguments to the function. For example:
1 2 3 4 5 | @app.route('/')
def index():
name, age, profession = "Jerry", 24, 'Programmer'
template_context = dict(name=name, age=age , profession=profession)
return render_template('index.html', **template_context)
|
The index.html template now have access to three template variables: name, age and profession.
What would happen if you don't specify the template context?
Nothing would happen, you will not get any warnings or exceptions, Jinja would render the template as usual and in place of variables empty string will be printed. To see this behavior in action modify index() view function as follows:
flask_app/main2.py
1 2 3 4 5 | #...
@app.route('/')
def index():
return render_template('index.html')
#...
|
And visit http://localhost:5000/. This time you will get the following HTML response:
1 2 3 4 5 6 7 8 9 10 11 12 | <!DOCTYPE html>
<html lang="en">
<head>
<meta charset="UTF-8">
<title>Title</title>
</head>
<body>
<p>Name: </p>
</body>
</html>
|
Now you should have a general idea of how templates are used in Flask, the next section shows how to render template inside the console.
Rendering Templates inside the Console #
For testing purpose rendering templates inside the console is quite easy, rather than creating several files. Start the Python shell and import Template class from the jinja2 package as follows.
1 2 3 | >>>
>>> from jinja2 import Template
>>>
|
To create a Template object simply pass the content of the template as a raw string.
1 2 3 | >>>
>>> t = Template("Name: {{ name }}")
>>>
|
To render the template call render() method of the Template object along with the data as keyword arguments.
1 2 3 4 | >>>
>>> t.render(name='Jerry')
'Name: Jerry'
>>>
|
In the next lesson, we will discuss Jinja Template Language.
Load Comments