Installing Python
Last updated on July 27, 2020
This lesson will guide you through the process of installing Python in Windows, Ubuntu and Mac OS. Although the whole tutorial is geared towards Python 3.4, you would be perfectly alright if you choose to use Python higher than 3.4. Just don't use Python 2.
Installing Python on Windows #
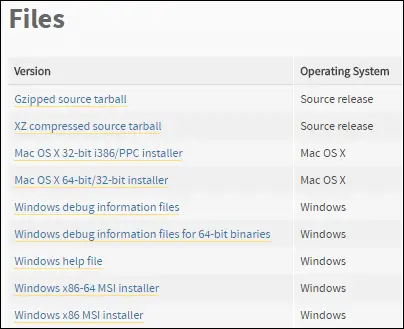
To install Python in Windows, head over to https://www.python.org/downloads/release/python-344/, scroll down the page until you see "Files" heading. There you will find different versions of Python that you can download.

If you are using a 32-bit version of Windows download Windows x86 installer and if you are using a 64-bit version of Windows download Windows x86-64 installer. Note that Windows x86 installer will work on 32-bit as well as 64-bit.
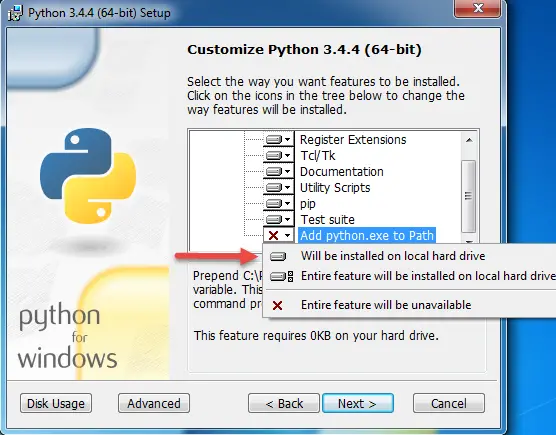
After downloading the installer, double-click it to start the installation process. The installation is very straightforward, just accept all the defaults. The only critical step in the installation process is that when you are asked to Customize the Python installation.

When this Window appears, use the scrollbar to scroll down the list. In front of the last item i.e "Add python.exe to Path", select "Will be installed on the local hard drive" using dropdown. This option allows us to call python.exe from any working directory in the Command Prompt without specifying the full path to it.
To verify the installation, open Command Prompt and enter the following command.
1 2 3 | C:\Users\Q>python --version
Python 3.4.4
C:\Users\Q>
|
Installing Python in Ubuntu #
Like most Linux distributions Ubuntu comes with Python pre-installed. In fact, some Linux distributions nowadays comes with Python 2 and Python 3 installed by default. To test which version of Python you have on your machine execute the following command.
1 2 3 | q@vm:~$ python3 --version
Python 3.5.2
q@vm:~$
|
As you can see, my Ubuntu installation has Python 3.5 which means I am good to go. However, if you get output something like this:
1 2 | q@vm:~$ python3 --version
python3: command not found
|
It means you don't have Python 3 installed on your computer. To install Python 3.4, execute the following commands one by one in the terminal.
1 2 3 | q@vm:~$: sudo add-apt-repository ppa:fkrull/deadsnakes
q@vm:~$: sudo apt-get update
q@vm:~$: sudo apt-get install python3.4
|
After executing these commands, run python3 --version again. This time you should get the following output:
1 2 3 | q@vm:~$ python3 --version
Python 3.4.5
q@vm:~$
|
Installing Python on Mac #
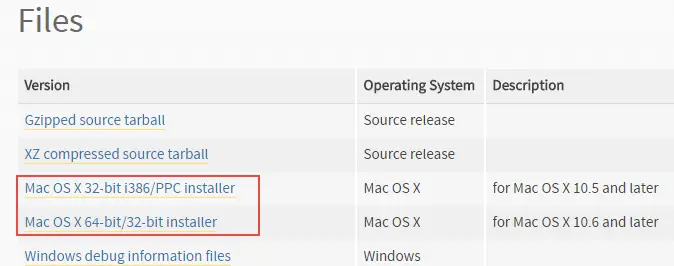
Most Macs already come with Python 2 installed. To install Python 3.4 on a Mac visit https://www.python.org/downloads/release/python-344/ and scroll down to bottom under Files heading select the installer corresponding to your version of Mac OS.

If you are using Mac OS X 32-bit system download Mac OS X 32-bit i386/PPC installer and if you are using Mac OS X 64-bit download Mac OS X 64-bit/32-bit installer. On a 64-bit system, both installers will work.
Double-click the downloaded file to start the installation process and accept all the defaults. Unlike Windows, Python installer for Macs automatically adds python to the PATH environment variable, so you don't need to do anything. To verify the installation execute the following command.
1 2 3 | Qs-Mac:~ q$ python3 --version
Python 3.4.4
Qs-Mac:~ q$
|
Load Comments