Django PayPal Integration with Django-Paypal
Last updated on July 27, 2020
This post describes how to integrate PayPal Payment gateway with Django using django-paypal.
Getting a PayPal Business Account. #
To integrate PayPal payment gateway into your application you will need a PayPal business account. Sign up for free business account by visiting https://www.paypal.com/.
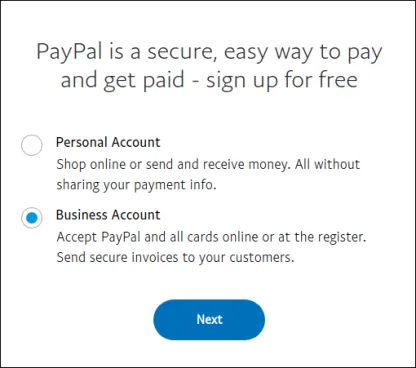
Select "Business Account" and click next.
In the next screen, you will be used asked to enter your email address, password and some details about your business. Enter all the relevant details and you will be sent a verification link to the provided email address.
Once the account is verified. You are ready for the next step.
Installing the Django Project #
The git repo of the Django project used in this post is available here. To install the project execute the following command:
Clone the project to your desired directory by executing the git clone command:
git clone https://github.com/overiq/simple_ecommerce.git
Change your current working directory to ecommerce using the cd command.
cd simple_ecommerce
Create a virtual environment using virtualenv package as follows:
virtualenv env
Activate the virtual environment by typing:
source env/bin/activate
The above command works only in Linux and Mac OS. If you are on Windows type the following:
env\Scripts\activate.bat
Install all the necessary packages to run the Django project using the requirements.txt file.
pip install -r requirements.txt
Change your current working directory to django_project using the cd command and run all the migrations using the migrate command.
1 2 | cd django_project
python manage.py migrate
|
Finally, start the server using by typing:
python manage.py runserver
Open your browser and navigate to http://localost:8000/. You should see home page of the application like this:
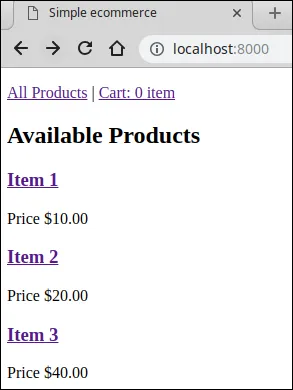
To add products to cart visit the product detail page by clicking on the product name.
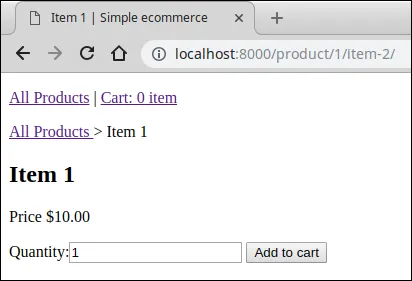
Enter the quantity and hit "Add to Cart" button. You should now see My Cart page, which looks like this:
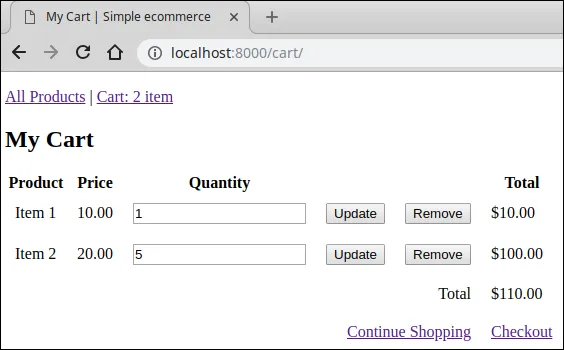
The My Cart page allows users to view all the items in the cart and the subtotal. You can also update the quantity or remove product from cart using "Update" and "Remove" button respectively. To add more items to the cart, hit "Continue Shopping".
Installing django-paypal #
The django-paypal is a third party application which eases the process of integrating PayPal with your Django application. To install django-paypal type the following command:
pip install django-paypal
Next, add django-paypal app to the INSTALLED_APPS list in settings.py file as follows:
simple_ecommerce/django_project/django_project/settings.py
1 2 3 4 5 6 7 8 9 10 11 12 13 14 | #...
INSTALLED_APPS = [
'django.contrib.admin',
'django.contrib.auth',
'django.contrib.contenttypes',
'django.contrib.sessions',
'django.contrib.messages',
'django.contrib.staticfiles',
'ecommerce_app',
'paypal.standard.ipn',
]
#...
|
You might be thinking what's IPN.
IPN or Instant Payment Notification is standard method used by online retailers to track purchases. IPN is sent via HTTP request from the Payment gateway to your application. An IPN message can represent payment success or failure, recurring payments, chargebacks, disputes etc.
To store the purchase details, create necessary tables using the migrate command as follows:
python manage.py migrate
Next, add the following two variables in the settings.py file:
simple_ecommerce/django_project/django_project/settings.py
1 2 3 4 5 6 7 8 | #...
MEDIA_ROOT = os.path.join(BASE_DIR, 'media')
MEDIA_URL = '/media/'
PAYPAL_RECEIVER_EMAIL = 'youremail@mail.com'
PAYPAL_TEST = True
|
The PAYPAL_RECEIVER_EMAIL setting refers to the email used to create the PayPal account. This is the email where all the notification will be sent. During testing you should set this to a sandbox account, otherwise the PayPal IPN will always return payment status pending.
The PAYPAL_TEST is a boolean value which is used to determine whether you want to use the live or sandbox account. The sandbox account is used to test things without sending any real payment in the process.
We will learn how to create sandbox account later in this post.
Finally, add the URLs associated with django-paypal in Django project's urls.py file as follows:
simple_ecommerce/django_project/django_project/urls.py
1 2 3 4 5 6 7 | #...
urlpatterns = [
path('admin/', admin.site.urls),
path('', include('cart.urls')),
path('paypal/', include('paypal.standard.ipn.urls')),
]
|
PayPal Standard IPN #
We have now configured the django-paypal app. The next step is to create a view function to display a form containing PayPal Buy Now button along with the order details.
To make things easier for us django-paypal provides a PayPalPaymentsForm class which creates a standard PayPal "Buy Now" button configured for a selling a single item with no shipping.
Before we start coding our view function, just to make things clear here is the workflow involved in using PayPal Standard IPN.
- User clicks the PayPal's "Buy Now" button.
- User is then redirected to PayPal to make the payment.
- After payment is made, the user is redirected back to your application.
- After a few seconds later, PayPal sends the IPN using the HTTP POST method.
Open the views.py file and add make_payment() view function as follows:
simple_ecommerce/django_project/ecommerce_app/views.py
1 2 3 4 5 6 7 8 9 10 11 12 13 14 15 16 17 18 19 20 21 22 23 24 25 26 27 28 29 30 31 32 33 34 | #...
from django.contrib import messages
from django.conf import settings
from decimal import Decimal
from paypal.standard.forms import PayPalPaymentsForm
from .models import Product, Order, LineItem
from .forms import CartForm, CheckoutForm
#...
def checkout(request):
#...
def process_payment(request):
order_id = request.session.get('order_id')
order = get_object_or_404(Order, id=order_id)
host = request.get_host()
paypal_dict = {
'business': settings.PAYPAL_RECEIVER_EMAIL,
'amount': '%.2f' % order.total_cost().quantize(
Decimal('.01')),
'item_name': 'Order {}'.format(order.id),
'invoice': str(order.id),
'currency_code': 'USD',
'notify_url': 'http://{}{}'.format(host,
reverse('paypal-ipn')),
'return_url': 'http://{}{}'.format(host,
reverse('payment_done')),
'cancel_return': 'http://{}{}'.format(host,
reverse('payment_cancelled')),
}
form = PayPalPaymentsForm(initial=paypal_dict)
return render(request, 'ecommerce_app/process_payment.html', {'order': order, 'form': form})
|
This view function works as follows:
- In line 1, we fetch the
order_idstored in the session using therequest.sessiondictionary. - In line 2, we fetch the
Orderobject associated with theorder_id. - In line 3, we use
get_host()method of theRequestobject to get the hostname. - In line 4, we create a dictionary of all the parameters that we are going to post to PayPal.
The following table lists some common parameters the can you can pass to PayPal.
| Parameter | Description |
|---|---|
business (required) |
Email ID you used to create the PayPal business account. |
amount (required) |
Amount of the product. |
item_name (required) |
Name or description of the item. |
invoice (optional) |
A number that uniquely identifies an invoice document. |
currency_code (optional) |
The currency of the payment. By default, it is set to 'USD'. |
quantity (optinal) |
Quantity of the items. It must be positive. |
notify_url (optional) |
The URL at which PayPal sends the IPN. |
return_url (optional) |
The URL at which PayPal redirects the user after they make the payment. |
cancel_return (optional) |
The URL at which PayPal redirects the user if they cancel the payment. |
Note: There are may other parameters you can pass to the PayPal. To view the complete list visit the documentation.
django-paypal provides a built-in view (named ipn) and a URL pattern (named paypal-ipn ) to handle the IPN message sent by PayPal. However, it doesn't provide views and URL pattern for return_url and cancel_return parameters. So, you will have to create them yourself.
In the views.py file, just below the make_payment() view, add two new views corresponding to return_url and cancel_return parameters as follows:
simple_ecommerce/django_project/ecommerce_app/views.py
1 2 3 4 5 6 7 8 9 10 11 12 13 14 15 16 17 18 19 | #...
from paypal.standard.forms import PayPalPaymentsForm
from django.views.decorators.csrf import csrf_exempt
from .models import Product, Order, LineItem
#...
def process_payment(request):
#...
@csrf_exempt
def payment_done(request):
return render(request, 'ecommerce_app/payment_done.html')
@csrf_exempt
def payment_canceled(request):
return render(request, 'ecommerce_app/payment_cancelled.html')
|
Note that both of the views are decorated with csrf_exempt decorator. This is because PayPal may redirect users to these views using the HTTP POST request.
Right now, after successful order, the checkout() view redirects the users to itself. We are nor ready to make payment, so let's update it to redirect the users to process_payment() view.
Open views.py file and update it as follows:
simple_ecommerce/django_project/ecommerce_app/views.py
1 2 3 4 5 6 7 8 9 10 11 12 13 14 15 16 17 18 19 | #...
def checkout(request):
if request.method == 'POST':
form = CheckoutForm(request.POST)
if form.is_valid():
cleaned_data = form.cleaned_data
#...
#...
cart.clear(request)
request.session['order_id'] = o.id
return redirect('process_payment')
else:
form = CheckoutForm()
return render(request, 'ecommerce_app/checkout.html', locals())
|
We have now created all the necessary view functions. Let's now create the templates.
Inside the templates/blog directory create three new templates make_payment.html, payment_done.html and payment_canceled.html with the following code:
process_payment.html
1 2 3 4 5 6 7 8 | {% extends 'ecommerce_app/base.html' %}
{% block title %}Make Payment{% endblock %}
{% block content %}
<h4>Pay with PayPal</h4>
{{ form.render }}
{% endblock %}
|
payment_done.html
1 2 3 4 5 6 7 | {% extends 'ecommerce_app/base.html' %}
{% block content %}
<p>Payment done.</p>
{% endblock %}
|
payment_cancelled.html
1 2 3 4 5 6 7 | {% extends 'ecommerce_app/base.html' %}
{% block content %}
<p>Payment cancelled.</p>
{% endblock %}
|
Most of the grunt work is now done. All we need now is to create some URL patterns.
Open urls.py file and add the three URL patterns as follows:
simple_ecommerce/django_project/ecommerce_app/urls.py
1 2 3 4 5 6 7 8 9 10 11 12 | #...
urlpatterns = [
path('', views.index, name='index'),
path('product/<int:product_id>/<slug:product_slug>/',
views.show_product, name='show_product'),
path('cart/', views.show_cart, name='show_cart'),
path('checkout/', views.checkout, name='checkout'),
path('process-payment/', views.process_payment, name='process_payment'),
path('payment-done/', views.payment_done, name='payment_done'),
path('payment-cancelled/', views.payment_canceled, name='payment_cancelled'),
]
|
Creating Sandbox Account #
A sandbox account allows us to test your code, without sending any real payments in the process. To create sandbox account visit https://developer.paypal.com/.
Login using the email and password you used to create the PayPal business account.
Once you are logged in click the "Account" link under the Sandbox on the left sidebar and you will be taken to the Sandbox Accounts page which looks like this:
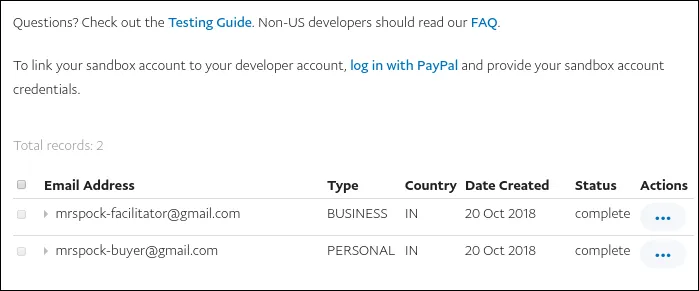
As you can see, PayPal has automatically created two sandbox accounts. The "facilitator" account can be used receive payments and "buyer" account can be used to make payments.
Since we are in the development phase, change PAYPAL_RECEIVER_EMAIL to the facilitator email as follows:
1 2 3 4 5 | #...
PAYPAL_RECEIVER_EMAIL = 'mrspock-facilitator@gmail.com'
PAYPAL_TEST = True
|
Keep in mind that if PAYPAL_TEST is set to True and you don't change PAYPAL_RECEIVER_EMAIL to the sandbox facilitator email, then PayPal IPN will always return payment status pending.
On some occasions, you will encounter that the PayPal failed to create the sandbox accounts. For example:
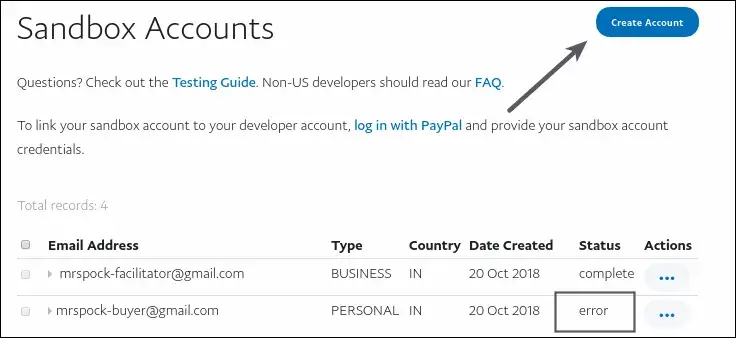
In the above image, notice that status of buyer account is set to error.
If this is the case, you can always create a new buyer or merchant account using the "Create Account" button at the top right corner of the page.
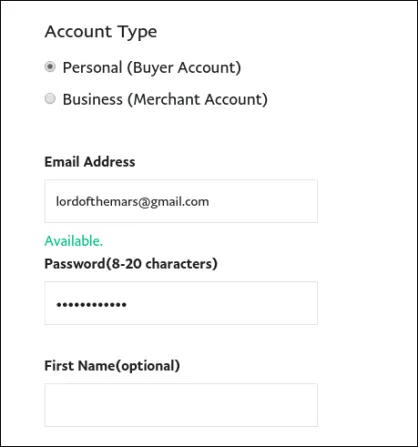
To create a sandbox account, you only need to enter email and password. Rest of the fields are optional or have some default value. Note that the email doesn't have to be a "real" one but it must be unique and not in use by another merchant on the Sandbox server.
With the sandbox accounts in place we are now ready to make some test payments.
Testing #
Start the development server if not already running using python manage.py runserver command and then visit http://localhost:8000/.
Add a few items into the cart and proceed to the checkout page. Fill the checkout form and click on the submit button. At this point, you should see a page like this:
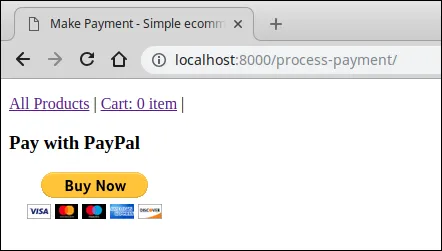
This page is brought to you by the make_payment() view function.
If you look at the source of the page you will find that the action attribute of the form tag points to PayPal's site.
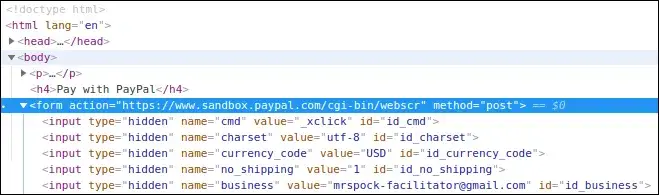
Click the Buy Now button and you will be redirected to PayPal to complete the payment.
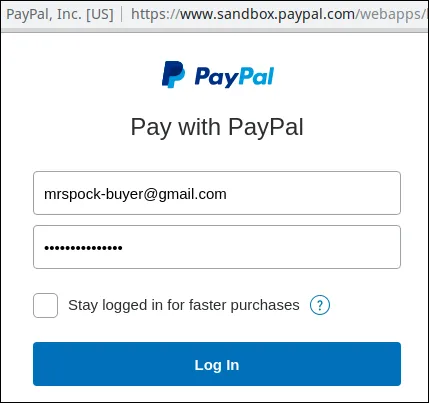
Enter the buyer email address (from the sandbox account), password and hit Log In. You will then be redirected to the Payment Review page which should looks like this:
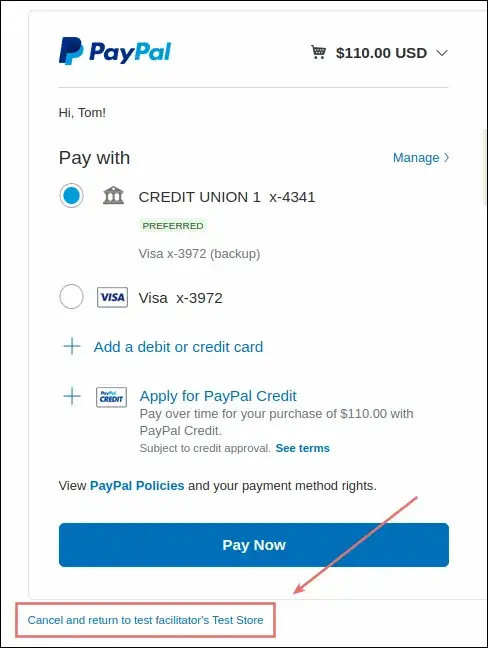
Click the Pay Now button to make the payment or you can cancel the payment by clicking the cancel and return link at the bottom of the page.
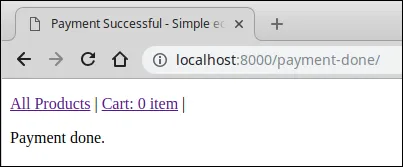
After successful payment, you will be redirected to the following page:
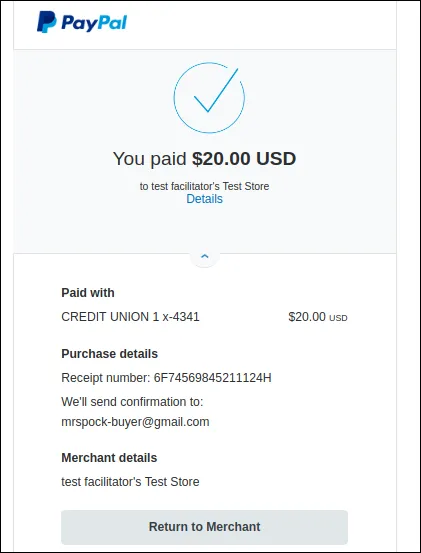
To return to the seller's site click the Return to Merchant button and you will be redirected to the URL specified in the return_url parameter.
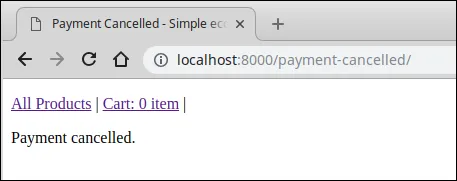
Had you clicked on the cancel and return payment link in the Payment Review page, then you would be redirected to the URL specified in the cancel_return parameter.
We have successfully made the payment. However, there is one little problem.
Login to the Django admin and visit PayPal IPN list page by clicking "PayPal IPN" link on the home page.
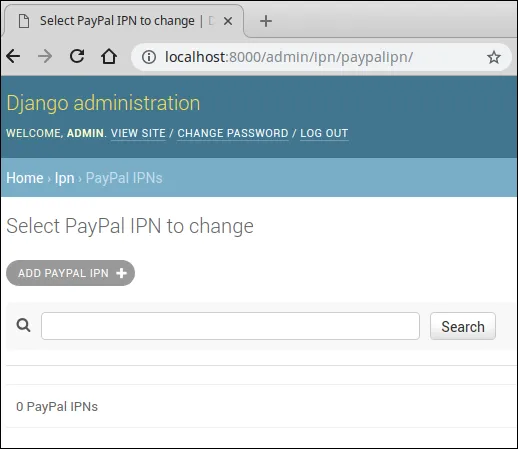
As you can see, we haven't received an IPN from the PayPal. This is because our application is not publicly accessible on the Internet.
We can make our application temporarily accessible over the Internet using a tool like ngrok.
Setting Up Ngrok #
To configure ngrok follow these steps:
- Download ngrok for your OS at https://ngrok.com/
- Unzip the downloaded file and you will get a binary file named
ngrok. - Copy the
ngrokfile into the same directory asmanage.py. - Start the HTTP tunnel by running
./ngrok http 8000.
The output of the above command should look like this:
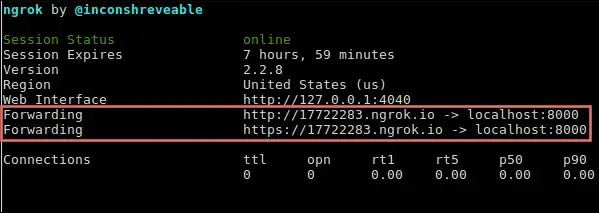
Our application is now accessible over the Internet using the following two URL:
http://17722283.ngrok.io/https://17722283.ngrok.io/
Note that these URLs are only valid for 7 hours and will change the next time you start ngrok. If you want to extend the expiration time, sign-up for a free account at https://ngrok.com/.
Copy any of the above URL and paste it into the browser address bar. You should be greeted with the homepage of the application as follows:
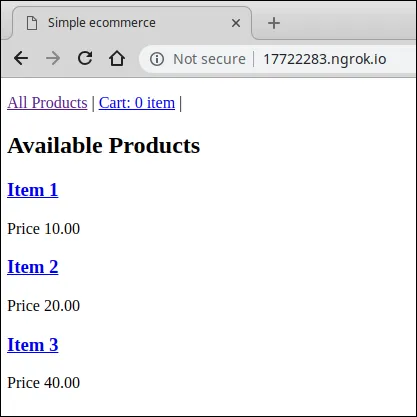
If you now place an order, you will instantly receive an IPN from the PayPal.
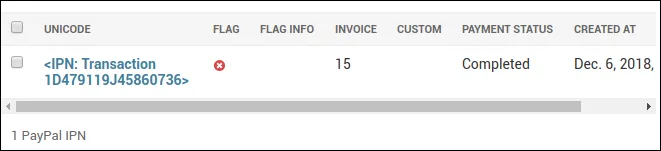
Notice that the PAYMENT STATUS column is set to Completed. This means that our last payment was successful.
Acting on Signals #
Our last two orders were successful, However, if you visit the order list page (i.e http://localhost:8000/admin/orders/order/), you will find that the paid field of both the orders is set to False.
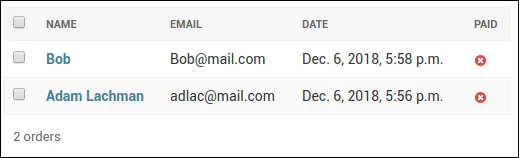
This happens because the default value of the paid field of the Order model is False. Furthermore, we are not changing this value when we save an order into the database.
When we save an order, we don't know whether the transaction is going to succeed or not because at this point, the user hasn't yet initiated the transaction. As a result, we can't set the paid field to True in advance.
However, once we have received an IPN, we can inspect the result and determine whether to set the paid field to True or not.
This is a standard workflow in any e-commerce application.
To handle situations like these, django-paypal provides the following two signals.
valid_ipn_receivedinvalid_ipn_received
valid_ipn_received - This signal is sent when a valid IPN is received from PayPal. The receiver function, that is the function that will be executed when this signal is triggered will receive a PayPalIPN object as a sender. The PayPalIPN object contains all the details pertaining to the transaction. The attributes we are interested in are as follows:
| Attribute | Description |
|---|---|
payment_status |
It determines whether the transaction is complete or not. If the transaction is successful, payment_status needs to be equal to 'Completed'. Other possible values are, 'Denied', 'Failed', 'Pending', 'Refunded' etc. |
business |
Email ID of the Merchant. |
mc_gross |
Total transaction amount (excluding the transaction fee). |
mc_currency |
Currency of the transaction. |
invalid_ipn_received - This signal is triggered when an an invalid IPN is received from PayPal.
The reason for invalid IPN could be a duplicate transaction ID or the transaction was flagged
because of a failed check with PayPal. We don't usually perform any action when we receive an invalid IPN, but you might want to log the problem for further investigation.
Let's now code a receiver function to act on the valid_ipn_received signal.
Create a new file named signal.py and add the following code to it.
simple_ecommerce/django_project/ecommerce_app/signals.py
1 2 3 4 5 6 7 8 9 10 11 12 13 14 15 16 17 | from django.shortcuts import get_object_or_404
from .models import Order
from paypal.standard.ipn.signals import valid_ipn_received
from django.dispatch import receiver
@receiver(valid_ipn_received)
def payment_notification(sender, **kwargs):
ipn = sender
if ipn.payment_status == 'Completed':
# payment was successful
order = get_object_or_404(Order, id=ipn.invoice)
if order.total_cost() == ipn.mc_gross:
# mark the order as paid
order.paid = True
order.save()
|
Here is how the receiver function works:
- When
valid_ipn_receivedsignal is sent,payment_notification()function is called with thePayPalIPNobject as a sender. - In line 1, we assign the
PayPalIPNobject to theipnvariable. - In line 2, we check whether the
payment_statusattribute is equal to'Completed'. If it is, we fetch theOrderobject and compare the total cost of the order (viaget_total_cost()) with the transaction amount ( i.emc_gross). This comparison is necessary, because it keeps someone from trying to pay \(1 for an order of \)100. If the comparison succeeds we mark the product paid by settingorder.paid=True.
Our receiver function is ready to rock and roll. All we need to do is to is to register the signal handler.
Open app.py file or create one if it doesn't already exists and add the following code to it.
simple_ecommerce/django_project/ecommerce_app/apps.py
1 2 3 4 5 6 7 8 9 | from django.apps import AppConfig
class EcommerceAppConfig(AppConfig):
name = 'ecommerce_app'
def ready(self):
# import signal handlers
import ecommerce_app.signals
|
To inform Django about the existence of PaymentConfig add the following line in __init__.py file:
simple_ecommerce/django_project/ecommerce_app/__init__.py
default_app_config = 'ecommerce_app.apps.EcommerceAppConfig'
That it. Now go ahead and place an order.
After a successful transaction, visit the order list page (i.e http://localhost:8000/admin/orders/order/).
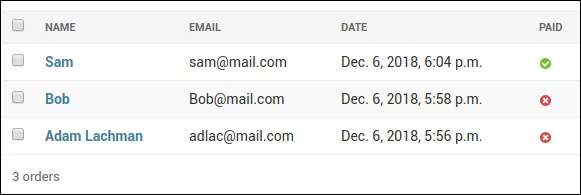
As you can see, this time the paid field of the order is now marked True.
Passing Custom Parameter (or Pass-through variables) #
Pass-through variables are simply parameters that you pass to the PayPal with the express intent of having it returned to the application. Pass-through variables are used to store data temporarily, for example, you can use pass-through variables to tie a user to transaction. These variables are not stored or used by PayPal in any way.
The following is a list of pass-through variables you can pass to the PayPal.
customitem_numberinvoice
Update the process_payment() view to include custom pass-through variable as follows:
simple_ecommerce/django_project/ecommerce_app/views.py
1 2 3 4 5 6 7 8 9 10 11 12 13 14 15 16 17 18 19 20 21 22 23 24 25 | #...
def process_payment(request):
order_id = request.session.get('order_id')
order = get_object_or_404(Order, id=order_id)
host = request.get_host()
paypal_dict = {
'business': settings.PAYPAL_RECEIVER_EMAIL,
'amount': '%.2f' % order.total_cost().quantize(
Decimal('.01')),
'item_name': 'Order {}'.format(order.id),
'invoice': str(order.id),
'currency_code': 'USD',
'custom': 'a custom value',
'notify_url': 'http://{}{}'.format(host,
reverse('paypal-ipn')),
'return_url': 'http://{}{}'.format(host,
reverse('payment_done')),
'cancel_return': 'http://{}{}'.format(host,
reverse('payment_cancelled')),
}
form = PayPalPaymentsForm(initial=paypal_dict)
return render(request, 'cart/process_payment.html', {'order': order, 'form': form})
|
Now place an order and you will receive an IPN containing the custom pass-through value as follows:

At times, you might want to pass multiple custom parameters to PayPal. One possible way to achieve this is to pack all the custom parameters using the | (pipe) character. Then, once you have received the packed data with the IPN split it on the | character.
The following shell session shows packing and unpacking in action.
1 2 3 4 5 6 7 8 9 10 11 12 13 14 | >>>
>>> l = ["one", "two", "three"] # custom parameters to pass to PayPal
>>>
>>> packed_data = str.join("|", l)
>>>
>>> packed_data
'one|two|three'
>>>
>>> unpacked_data = packed_data.split("|")
>>>
>>> unpacked_data
['one', 'two', 'three']
>>>
>>>
|
Load Comments