Cookies in Flask
Last updated on July 27, 2020
Up until now, the pages we have built were very simple. The browser sends the request to the server, the server responds with the HTML page and that's all pretty much to it. The HTTP is a stateless protocol. It means that HTTP has no inbuilt way to tell the server, that both of these requests came from the same user. As a result, the server has no idea whether you are requesting the page for the first time or thousandth time. It serves everyone equally as if they are requesting the page for the first time.
Visit an e-commerce site and browse some items. On your next visit to the site, you will get some product recommendations based on your previous browsing patterns. So how come the site knows your presence?
The answer lies in Cookies and Sessions.
This lesson discusses Cookies, Session will be discussed in the next lesson.
What is a Cookie? #
A cookie is just a piece of data which the server sets in the browser. Here is how it works:
- The browser sends the request for a webpage to the server.
- The server responds to the browser request by sending the requested webpage along with one or more cookies.
- Upon receiving the response, the browser renders the webpage and saves the cookie in the user computer.
- The subsequent request to the server will include data from all the cookies in the
Cookieheader. This process will continue until the cookie expires. Once the cookie expires, it is removed from the browser.
Setting a Cookie #
In Flask, we use set_cookie() method of the response object to set cookies. The syntax of set_cookie() method is as follows:
set_cookie(key, value="", max_age=None)
The key is a required argument and refers to the name of the cookie. The value is data you want to store in the cookie and it defaults to empty string. The max_age refers to the expiration time of the cookie in seconds, if not set the cookie will cease to exist when the user closes the browser.
Open main2.py and add the following code just after the contact() view function:
flask_app/main2.py
1 2 3 4 5 6 7 8 | from flask import Flask, render_template, request, redirect, url_for, flash, make_response
#...
@app.route('/cookie/')
def cookie():
res = make_response("Setting a cookie")
res.set_cookie('foo', 'bar', max_age=60*60*24*365*2)
return res
#...
|
Here we are creating a cookie named foo with the value bar that will last for 2 years.
Start the server and visit http://localhost:5000/cookie/. You should see a page with "Setting a cookie" as a response. To view the cookie set by the server open Storage Inspector in Firefox by hitting Shift + F9. A new window will appear at the bottom of the browser window. On the left side, select "Cookies" storage type and then click on http://localhost:5000/ to view all cookies set by the server at http://localhost:5000/.

From now onwards, the cookie foo will be sent along with any request to the server at http://localhost:5000/. We can verify this using the Network Monitor in Firefox. Open Network Monitor by pressing Ctrl+Shift+E and visit http://localhost:5000/. In the Network request list on left select the first request and you will get request details on the right pane as follows:

Note that once the cookie is set the subsequent requests to http://localhost:5000/cookie will update the expiration time of the cookie.
Accessing Cookies #
To access the cookie, we use the cookie attribute of the request object. The cookie attribute is a dictionary like attribute which contains all the cookies sent by the browser. Open main2.py and modify the cookie() view function as follows:
flask_app/main2.py
1 2 3 4 5 6 7 8 9 10 | #...
@app.route('/cookie/')
def cookie():
if not request.cookies.get('foo'):
res = make_response("Setting a cookie")
res.set_cookie('foo', 'bar', max_age=60*60*24*365*2)
else:
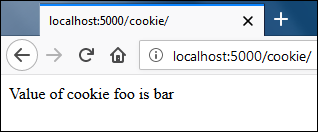
res = make_response("Value of cookie foo is {}".format(request.cookies.get('foo')))
return res
#...
|
We have modified our view function to display the cookie value assuming there is a cookie. Otherwise, it will set a cookie for us.
Visit http://localhost:5000/cookie/ and this time you should get the following response.
The request object is also available inside the template. That means, inside the template, we can access the cookies using the same way as in Python code. We will see an example of this in the upcoming section.
Deleting Cookies #
To delete a cookie call set_cookie() method with the name of the cookie and any value and set the max_age argument to 0. Open main2.py file and add the following code just after the cookie() view function.
flask_app/main2.py
1 2 3 4 5 6 7 | #...
@app.route('/delete-cookie/')
def delete_cookie():
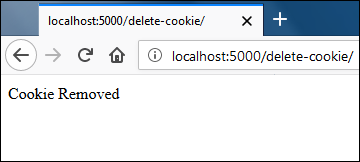
res = make_response("Cookie Removed")
res.set_cookie('foo', 'bar', max_age=0)
return res
#...
|
Visit http://localhost:5000/delete-cookie/ and you will get the following response:
Now you should have a good understanding of how a cookie works. The following listing gives you a practical example of how a cookie can be used to store the user preference.
In main2.py add the following code after the delete_cookie() view function.
flask_app/main2.py
1 2 3 4 5 6 7 8 9 10 11 12 | #...
@app.route('/article/', methods=['POST', 'GET'])
def article():
if request.method == 'POST':
print(request.form)
res = make_response("")
res.set_cookie("font", request.form.get('font'), 60*60*24*15)
res.headers['location'] = url_for('article')
return res, 302
return render_template('article.html')
#...
|
Create a new template article.html with the following code:
1 2 3 4 5 6 7 8 9 10 11 12 13 14 15 16 17 18 19 20 21 22 23 24 25 26 27 | <!DOCTYPE html>
<html lang="en">
<head>
<meta charset="UTF-8">
<title>Article</title>
</head>
<body style="{% if request.cookies.get('font') %}font-family:{{ request.cookies.get('font') }}{% endif %}">
Select Font Preference: <br>
<form action="" method="post">
<select name="font" onchange="submit()">
<option value="">----</option>
<option value="consolas" {% if request.cookies.get('font') == 'consolas' %}selected{% endif %}>consolas</option>
<option value="arial" {% if request.cookies.get('font') == 'arial' %}selected{% endif %}>arial</option>
<option value="verdana" {% if request.cookies.get('font') == 'verdana' %}selected{% endif %}>verdana</option>
</select>
</form>
<h1>Festus, superbus toruss diligenter tractare de brevis, dexter olla.</h1>
<p>Lorem ipsum dolor sit amet, consectetur adipisicing elit. Aperiam blanditiis debitis doloribus eos magni minus odit, provident tempora. Expedita fugiat harum in incidunt minus nam nesciunt voluptate. Facilis nesciunt, similique!
</p>
<p>Lorem ipsum dolor sit amet, consectetur adipisicing elit. Alias amet animi aperiam inventore molestiae quos, reiciendis voluptatem. Ab, cum cupiditate fugit illo incidunt ipsa neque quam, qui quidem vel voluptatum.</p>
</body>
</html>
|
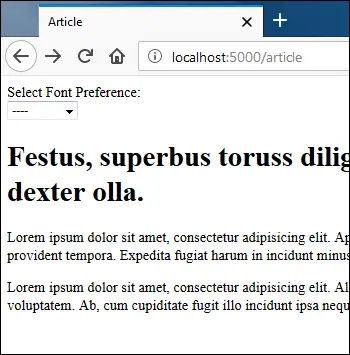
The first time user visits http://localhost:5000/article, the page is displayed using the default browser font. When the user changes the font using the dropdown, we submit the form. The if condition request.method == 'POST' becomes true and we set a cookie named font with the value of the selected font that will expire in 15 days, the user is then redirected to http://localhost:5000/article. And the user is displayed the page in the selected font.
In the browser visit, http://localhost:5000/article and you will be displayed a page in browser default font.
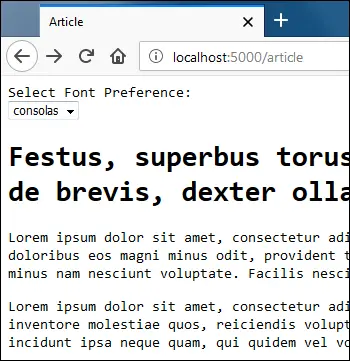
Select the font from the dropdown and you will be displayed the page in the selected font.
Drawbacks of Cookie #
Before using cookies extensively in your project, you must be aware of its shortcomings.
Cookies are not secure. The data stored in the cookie is visible to anyone, so you shouldn't use it to store sensitive data like passwords, credit card details and so on.
Cookies can be disabled. Most browsers give users option to disable cookies. When cookies are disabled you will not get any warnings or error messages, instead, the response header to set the cookie is simply discarded. To counter these problems, you can Javascript code like the following to alert the user that your application needs cookies to work properly.
1
2
3
4
5
6
7
<script>
    document.cookie = "foo=bar;";
    if (!document.cookie)
    {
        alert("This website requires cookies to function properly");
    }
</script>
Each Cookie can store no more than 4KB of data. In addition to that browsers also imposes limits on the number of cookies a website can set. This limit varies from browser to browser. Some browsers accept 50 cookies per website and other accepts 30.
Cookies are sent everytime you request a page from the server. Say you have 20 cookies and each of them store 4KB of data. That means you have an additional payload of 80KB on every request!
We can solve some of these problems using sessions.That's the topic of the next lesson.
Load Comments