Form Handling in Flask
Last updated on July 27, 2020
Forms are an essential part of any web application but unfortunately working with them is quite difficult. It all starts with the client, first, you have to validate the data on client side, then on the server. If that's not enough, you have take care of all the security concerns like CSRF, XSS, SQL Injection and so on. All in all, that's a lot of work. Fortunately, we have an excellent library called WTForms to do the heavy lifting for us. Before we learn more about WTForms, the following section gives you a little tour on how you can go about handling forms in Flask without using any library or package.
Form Handling - The Hard Way #
Create a new template named login.html with the following code:
flask_app/template/login.html
1 2 3 4 5 6 7 8 9 10 11 12 13 14 15 16 17 18 19 20 21 22 23 24 25 26 27 28 | <!DOCTYPE html>
<html lang="en">
<head>
<meta charset="UTF-8">
<title>Login</title>
</head>
<body>
{% if message %}
<p>{{ message }}</p>
{% endif %}
<form action="" method="post">
<p>
<label for="username">Username</label>
<input type="text" name="username">
</p>
<p>
<label for="password">Password</label>
<input type="password" name="password">
</p>
<p>
<input type="submit">
</p>
</form>
</body>
</html>
|
Next, add the following code just after the books() view function in main2.py.
flask_app/main2.py
1 2 3 4 5 6 7 8 9 10 11 12 13 14 15 16 | from flask import Flask, render_template, request
#...
@app.route('/login/', methods=['post', 'get'])
def login():
message = ''
if request.method == 'POST':
username = request.form.get('username') # access the data inside
password = request.form.get('password')
if username == 'root' and password == 'pass':
message = "Correct username and password"
else:
message = "Wrong username or password"
return render_template('login.html', message=message)
#...
|
Notice the methods argument passed to the route() decorator. By default, the request handler is only called when the request.method is either GET or HEAD. This can be changed by passing list of allowed HTTP methods to the methods keyword argument. From now on, the login() view function
will be called only when the request to /login/ is made using GET, POST or HEAD method. Trying to access /login/ URL using any other method will result in HTTP 405 Method Not Allowed error.
In previous lessons, we have discussed that the request object provides information about the current web request. The data submitted via the form is stored in the form attribute of the request object. The request.form is a dictionary like immutable object known as ImmutableMultiDict.
Start the server and visit http://localhost:5000/login/. You should see a form like this.
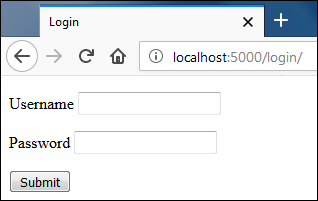
The page is requested using the GET request, so the code inside the if block
in login() view function is skipped.
Submit the form without entering anything and you should see a page like this:
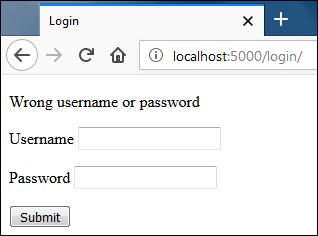
This time the page was submitted using the POST method, so the code inside the if block is executed. Inside the if body we access username and password and set the value of message variable accordingly. Since we submitted an empty form, an error message is displayed.
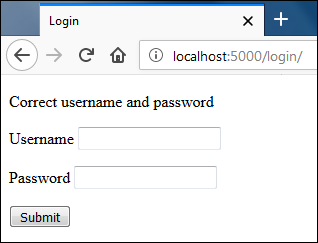
Fill the form with correct username and password and hit enter. You should be greeted with "Correct username and password" message as follows:
That's how we handle forms in Flask. Let's now shift our attention to the WTForms package.
WTForms #
WTForms is a powerful framework-agnostic (framework independent) library written in Python. It allows us to generate HTML forms, validate forms, pre-populate form with data (useful for editing) and so on. In addition to that it also provides CSRF protection. To install WTForms we use Flask-WTF.
Flask-WTF is a Flask Extension which integrates Flask with WTForms. Flask-WTF also provides some additional features like File Uploads, reCAPTCHA, internationalization (i18n) and so on. To install Flask-WTF enter the following command.
(env) overiq@vm:~/flask_app$ pip install flask-wtfCreating Form class #
We start by defining our forms as Python classes. Every form class must extend the FlaskForm class of the flask_wtf package. The FlaskForm is a wrapper containing some useful methods around the original wtform.Form class, which is the base class for creating forms. Inside the form class, we define form fields as class variables. Form fields are defined by creating an object associated with the field type. The wtform package provides several classes which represent form fields like StringField, PasswordField, SelectField, TextAreaField, SubmitField and so on.
Create a new file forms.py inside flask_app dictionary and add the following code to it.
flask_app/forms.py
1 2 3 4 5 6 7 8 9 | from flask_wtf import FlaskForm
from wtforms import StringField, SubmitField, TextAreaField
from wtforms.validators import DataRequired, Email
class ContactForm(FlaskForm):
name = StringField("Name: ", validators=[DataRequired()])
email = StringField("Email: ", validators=[Email()])
message = TextAreaField("Message", validators=[DataRequired()])
submit = SubmitField("Submit")
|
Here we have defined a form class ContactForm which contains four form fields: name, email, message and submit. These variables will be used to render the form fields as well as set and retrieve data to and from the fields. The form is created using two StringField's, a TextAreaField and a SubmitField. Everytime we create a field object, we pass some arguments to its constructor function. The first argument is a string containing the label, that will displayed inside the <label> tag when the form field is rendered. The second optional argument is a list of validators passed to the constructor function as keyword arguments. The validators are functions or classes which determines whether the data in the field is valid or not. We can apply more that one validator to a field by separating them by a comma (,). The wtforms.validators module provides some basic validators but we can also create our own validators. In this form, we are using two built-in validators DataRequired and Email.
DataRequired: It ensures that the user must enter some data in the field.
Email: It checks whether the entered data is a valid email address or not.
The data in the field will not be accepted until all the validators applied on it are satisfied.
Note: We have barely scratched the surface of form fields and validators, to view the full list visit https://wtforms.readthedocs.io/en/master/.
Setting up the Secret Key #
By default, Flask-WTF prevents all forms from CSRF attacks. It does this by embedding a token in a hidden <input> element inside the form. The token is then used to verify the authenticity of the request. Before Flask-WTF can generate csrf token, we have to add a secret key. Open main2.py and set the secret key as follows:
flask_app/main2.py
1 2 3 4 5 6 | #...
app.debug = True
app.config['SECRET_KEY'] = 'a really really really really long secret key'
manager = Manager(app)
#...
|
Here we are using the config attribute of the Flask object. The config attribute works just like a dictionary and it is used to place configuration options for Flask and Flask extensions but you can also place your own configuration if you want to.
The secret key should be a long, hard to guess string. The use of SECRET_KEY is not just limited to creating CSRF tokens, it is used by Flask and many other extensions. The secret key should be kept secret. Rather than storing the secret key in the application, a much better approach would be to store it in an environment variable. We will learn how to do this in later chapters.
Forms in the Console #
Open Python shell by entering the following command:
(env) overiq@vm:~/flask_app$ python main2.py shellThis will start Python shell inside the application context.
Now import ContactForm class and instantiate a new form object by passing form data to it.
1 2 3 4 5 6 7 | >>>
>>> from forms import ContactForm
>>> from werkzeug.datastructures import MultiDict
>>>
>>>
>>> form1 = ContactForm(MultiDict([('name', 'jerry'),('email', 'jerry@mail.com')]))
>>>
|
Notice that we are passing form data as MultiDict object, because the constructor function of wtforms.Form class accepts an argument of type MultiDict. If the form data is not specified while instantiating form object and the form is submitted using POST request, wtforms.Form will use the data from the request.form attribute. Recall that request.form returns an object of type ImmutableMultiDict which is same as MultiDict object but it is immutable.
The validate() method of the form object validates the form. On success, it returns True, otherwise False.
1 2 3 4 | >>>
>>> form1.validate()
False
>>>
|
Our form failed to validate because we haven't provided any data to the required message field while creating the form object. We can access form errors using the errors attribute of the form object:
1 2 3 4 | >>>
>>> form1.errors
{'message': ['This field is required.'], 'csrf_token': ['The CSRF token is missing.']}
>>>
|
Notice that in addition to error message for the message field, the output also contains error message for the missing csrf token. This is because we don't have an actual POST request with csrf token in the form data.
We can turn off CSRF protection on the form by passing csrf_enabled=False while instantiating form class. Here is an example:
1 2 3 4 5 6 7 8 9 10 | >>>
>>> form3 = ContactForm(MultiDict([('name', 'spike'),('email', 'spike@mail.com')]), csrf_enabled=False)
>>>
>>> form3.validate()
False
>>>
>>> form3.errors
{'message': ['This field is required.']}
>>>
>>>
|
As expected, now we are only getting error for the missing message field. Let's create another form object but this time we will supply valid data to all the form fields.
1 2 3 4 5 6 7 8 9 | >>>
>>> form4 = ContactForm(MultiDict([('name', 'jerry'), ('email', 'jerry@mail.com'), ('message', "hello tom")]), csrf_enabled=False)
>>>
>>> form4.validate()
True
>>>
>>> form4.errors
{}
>>>
|
The form validation succeeds this time.
Our next logical step would be to render the form which is discussed next.
Rendering Form #
There are two ways to render form fields:
- Render fields one by one.
- Render fields using a for loop.
Rendering fields one by one #
In the templates, once we have access to form instance, we can use the field names to render fields, label, and errors as follows:
1 2 3 4 5 6 7 8 9 10 | {# render the label tag associated with field #}
{{ form.field_name.label() }}
{# render the field itself #}
{{ form.field_name() }}
{# render the validation errors associated with the field #}
{% for error in form.field_name.errors %}
{{ error }}
{% endfor %}
|
Let's test this inside the console:
1 2 3 4 5 6 | >>>
>>> from forms import ContactForm
>>> from jinja2 import Template
>>>
>>> form = ContactForm()
>>>
|
Here we have instantiated the form object without any request data, this is usually the case when the form is displayed for the first time using the GET request.
1 2 3 4 5 6 7 8 9 10 11 12 13 14 15 16 17 18 19 20 21 22 23 24 25 26 27 | >>>
>>>
>>> Template("{{ form.name.label() }}").render(form=form)
'<label for="name">Name: </label>'
>>>
>>> Template("{{ form.name() }}").render(form=form)
'<input id="name" name="name" type="text" value="">'
>>>
>>>
>>> Template("{{ form.email.label() }}").render(form=form)
'<label for="email">Email: </label>'
>>>
>>> Template("{{ form.email() }}").render(form=form)
'<input id="email" name="email" type="text" value="">'
>>>
>>>
>>> Template("{{ form.message.label() }}").render(form=form)
'<label for="message">Message</label>'
>>>
>>> Template("{{ form.message() }}").render(form=form)
'<textarea id="message" name="message"></textarea>'
>>>
>>>
>>> Template("{{ form.submit() }}").render(form=form)
'<input id="submit" name="submit" type="submit" value="Submit">'
>>>
>>>
|
Since the form is displayed for the first time, none of its fields will have any validation errors. The following code demonstrates this:
1 2 3 4 5 6 7 8 9 10 11 12 13 14 | >>>
>>>
>>> Template("{% for error in form.name.errors %}{{ error }}{% endfor %}").render(form=form)
''
>>>
>>>
>>> Template("{% for error in form.email.errors %}{{ error }}{% endfor %}").render(form=form)
''
>>>
>>>
>>> Template("{% for error in form.message.errors %}{{ error }}{% endfor %}").render(form=form)
''
>>>
>>>
|
Instead of displaying validation errors per field you can use form.errors to access all the validation errors associated with the form. The forms.errors is commonly used to display validation errors at the top of the form.
1 2 3 4 | >>>
>>> Template("{% for error in form.errors %}{{ error }}{% endfor %}").render(form=form)
''
>>>
|
While rendering fields and labels, we can also supply additional keyword arguments which will be injected in the HTML as key value pairs. For example:
1 2 3 4 5 6 7 8 9 | >>>
>>> Template('{{ form.name(class="input", id="simple-input") }}').render(form=form)
'<input class="input" id="simple-input" name="name" type="text" value="">'
>>>
>>>
>>> Template('{{ form.name.label(class="lbl") }}').render(form=form)
'<label class="lbl" for="name">Name: </label>'
>>>
>>>
|
Now suppose our form has been submitted. Let' try rendering fields this time and see what happens.
1 2 3 4 5 6 7 8 9 10 11 12 13 14 15 16 17 18 19 20 21 | >>>
>>> from werkzeug.datastructures import MultiDict
>>>
>>> form = ContactForm(MultiDict([('name', 'spike'),('email', 'spike@mail.com')]))
>>>
>>> form.validate()
False
>>>
>>>
>>> Template("{{ form.name() }}").render(form=form)
'<input id="name" name="name" type="text" value="spike">'
>>>
>>>
>>> Template("{{ form.email() }}").render(form=form)
'<input id="email" name="email" type="text" value="spike@mail.com">'
>>>
>>>
>>> Template("{{ form.message() }}").render(form=form)
'<textarea id="message" name="message"></textarea>'
>>>
>>>
|
Notice that the value attribute of name and email field is filled with the data. However, the <textarea> element for the message field is empty since we didn't supply any data to it. We can access the validation error for the message field as follows:
1 2 3 4 | >>>
>>> Template("{% for error in form.message.errors %}{{ error }}{% endfor %}").render(form=form)
'This field is required.'
>>>
|
Alternatively, you can also use form.errors to loop through all the validation errors at once.
1 2 3 4 5 6 7 8 9 10 11 12 13 14 | >>>
>>> s ="""\
... {% for field_name in form.errors %}\
... {% for error in form.errors[field_name] %}\
... <li>{{ field_name }}: {{ error }}</li>
... {% endfor %}\
... {% endfor %}\
... """
>>>
>>> Template(s).render(form=form)
'<li>csrf_token: The CSRF token is missing.</li>\n
<li>message: This field is required.</li>\n'
>>>
>>>
|
Notice that we are getting missing csrf token error because the request the was submitted without csrf token. We can render the csrf field just like a normal field as follows:
1 2 3 4 5 | >>>
>>> Template("{{ form.csrf_token() }}").render(form=form)
'<input id="csrf_token" name="csrf_token" type="hidden" value="IjZjOTBkOWM4ZmQ0M
GMzZTY3NDc3ZTNiZDIxZTFjNDAzMGU1YzEwOTYi.DQlFlA.GQ-PrxsCJkQfoJ5k6i5YfZMzC7k">'
>>>
|
Rendering field one by one can be cumbersome if you have quite a few form fields. For such cases, you can use for loop to render the fields.
Rendering fields using loop #
The following shell session demonstrates how we can render fields using the for loop.
1 2 3 4 5 6 7 8 9 10 11 12 13 14 15 16 17 18 19 20 21 22 23 24 25 26 27 28 29 30 31 32 33 34 35 36 37 38 39 40 41 42 43 44 45 46 47 48 49 50 51 52 | >>>
>>> s = """\
... <div>
... {{ form.csrf_token }}
... </div>
... {% for field in form if field.name != 'csrf_token' %}
... <div>
... {{ field.label() }}
... {{ field() }}
... {% for error in field.errors %}
... <div class="error">{{ error }}</div>
... {% endfor %}
... </div>
... {% endfor %}
... """
>>>
>>>
>>> print(Template(s).render(form=form))
<div>
<input id="csrf_token" name="csrf_token" type="hidden" value="IjZjOTBkOW
M4ZmQ0MGMzZTY3NDc3ZTNiZDIxZTFjNDAzMGU1YzEwOTYi.DQlFlA.GQ-PrxsCJkQfoJ5k6i5YfZMzC7
k">
</div>
<div>
<label for="name">Name: </label>
<input id="name" name="name" type="text" value="spike">
</div>
<div>
<label for="email">Email: </label>
<input id="email" name="email" type="text" value="spike@mail.com">
</div>
<div>
<label for="message">Message</label>
<textarea id="message" name="message"></textarea>
<div class="error">This field is required.</div>
</div>
<div>
<label for="submit">Submit</label>
<input id="submit" name="submit" type="submit" value="Submit">
</div>
>>>
>>>
|
It is important to note that no matter which method you use you have to manually add <form> tag to wrap the form fields.
Now we know how to create, validate and render forms. Let's use this knowledge to create some real forms.
Start by creating a new template contact.html with the following code:
flask_app/templates/contact.html
1 2 3 4 5 6 7 8 9 10 11 12 13 14 15 16 17 18 19 20 21 22 23 24 25 | <!DOCTYPE html>
<html lang="en">
<head>
<meta charset="UTF-8">
<title>Title</title>
</head>
<body>
<form action="" method="post">
{{ form.csrf_token() }}
{% for field in form if field.name != "csrf_token" %}
<p>{{ field.label() }}</p>
<p>{{ field }}
{% for error in field.errors %}
{{ error }}
{% endfor %}
</p>
{% endfor %}
</form>
</body>
</html>
|
The only missing piece of the puzzle is the view function which we will create next.
Handing Form Submission #
Open main2.py and add the following code just after the login() view function.
flask_app/main2.py
1 2 3 4 5 6 7 8 9 10 11 12 13 14 15 16 17 18 19 20 | from flask import Flask, render_template, request, redirect, url_for
from flask_script import Manager, Command, Shell
from forms import ContactForm
#...
@app.route('/contact/', methods=['get', 'post'])
def contact():
form = ContactForm()
if form.validate_on_submit():
name = form.name.data
email = form.email.data
message = form.message.data
print(name)
print(email)
print(message)
# db logic goes here
print("\nData received. Now redirecting ...")
return redirect(url_for('contact'))
return render_template('contact.html', form=form)
#...
|
In line 7, we are creating a form object. In line 8, we are are checking the return value of validate_on_submit() method to execute some code inside the body of the if statement.
Why we are using validate_on_submit() instead of validate() just like we did in the console ?
The validate() method simply checks whether the form data is valid or not, it doesn't check whether the request is submitted using the POST method or not. That means if use we validate() method then a GET request to /contact/ would trigger the form validation and users will see validation errors in the form. In general, we trigger validation routines only when the data is submitted using the POST request. The validate_on_submit() method returns True when the form is submitted using the POST request and data is valid. Otherwise False. The validate_on_submit() method internally calls the validate() method. Also, notice that we are not passing any data while instantiating the form object because when the form is submitted using the POST request WTForms reads the form data from the request.form attribute.
The form fields defined in the form class becomes attribute to the form object. To access field data we use the data attribute of the form field:
1 2 | form.name.data # access the data in the name field.
form.email.data # access the data in the email field.
|
To access all the form data at once use the data attribute of the form object:
form.data # access all the form data
When you visit URL /contact/ using the GET request, the validate_on_submit() method returns False, the code inside the if body is skipped and the user is displayed an empty HTML form.
When the form is submitted using the POST request, the validate_on_submit() returns True assuming the data is valid. The print() calls inside the if body prints the data entered by the user and the redirect() function redirects the user to the /contact/ page. On the other hand if validate_on_submit() returns False execution of statements inside the if body is skipped and form with validation errors is displayed.
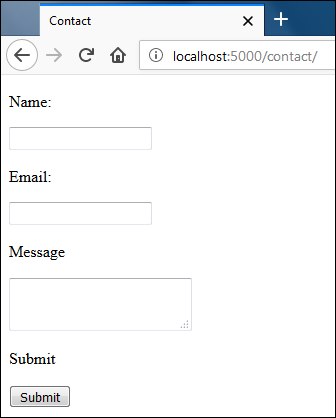
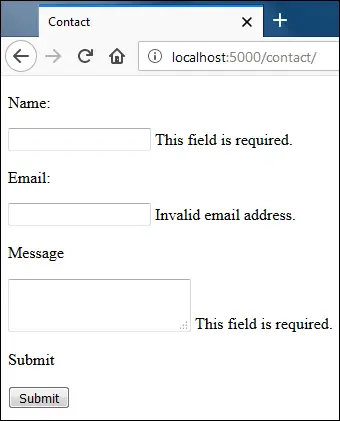
Start the server, if not already running and visit http://localhost:5000/contact/. You should see Contact Form like this:
Without entering anything hit submit and you will be displayed validation errors like this:
Enter some data in Name and Message field and invalid data in the Email field and submit the form again.
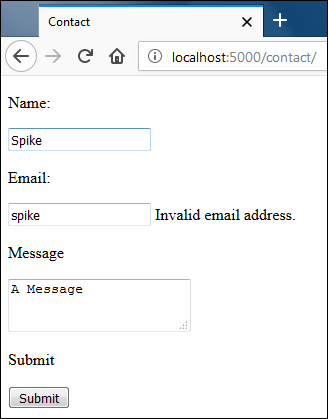
Notice that all the fields still contains data from the previous request.
Enter a valid email in the Email field and hit submit. This time our validation will succeed and inside the shell running the server you should see output like this:
Spike
spike@gmail.com
A Message

Data received. Now redirecting ...
After displaying submitted data in the shell the view function will redirect the user to /contact/ URL again. At this point, you should see an empty form without any validation errors as if you visited /contact/ URL using the GET request for the first time.
It is good practice to display some feedback to the user after successful form submission. In Flask, we create such feedback using flash messages which is discussed next.
Flash Messages #
Flash messages is another one of those functions which depend upon the secret key. The secret key is necessary because behind the scenes flash messages are stored in the sessions. We will learn what sessions are and how to use them in depth in lesson Session in Flask. Since we have already set the secret key, we are ready to go.
To flash messages, we use flash() function from the flask package. The flash() function accepts two arguments, the message to flash and an optional category. The category indicates the type of message such as success, error, warning etc. The category can be used in the template to determine the type of alert message to display.
Open main2.py and add flash("Message Received", "success") just before the redirect() call in the contact() view function as follows:
flask_app/main2.py
1 2 3 4 5 6 7 | from flask import Flask, render_template, request, redirect, url_for, flash
#...
# db logic goes here
print("\nData received. Now redirecting ...")
flash("Message Received", "success")
return redirect(url_for('contact'))
return render_template('contact.html', form=form)
|
The message set by the flash() function will only be available for the subsequent request and then it will be deleted.
We are now setting the flash message, to display it, we have to modify our template too.
Open contact.html and modify the file as follows:
flask_app/templates/contact.html
1 2 3 4 5 6 7 | <body>
{% for category, message in get_flashed_messages(with_categories=true) %}
<p class="{{ category }}">{{ message }}</p>
{% endfor %}
<form action="" method="post">
|
Jinja provides a function called get_flashed_messages() which returns a list of pending flash messages without the category. To get the flash message along with the category pass with_categories=True while calling get_flashed_messages(). When with_categories is set to True, get_flashed_messages() returns a list of tuples of the form (category, message).
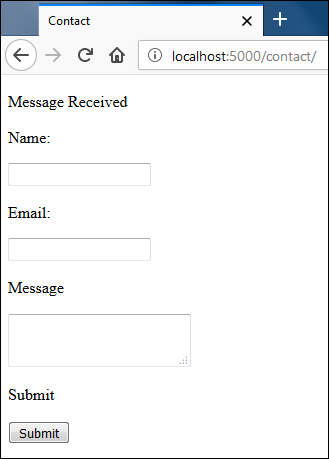
After making these changes visit http://localhost:5000/contact/ again. Fill the form and hit submit. This time you should get a success message at top of the form as follows:
Load Comments